
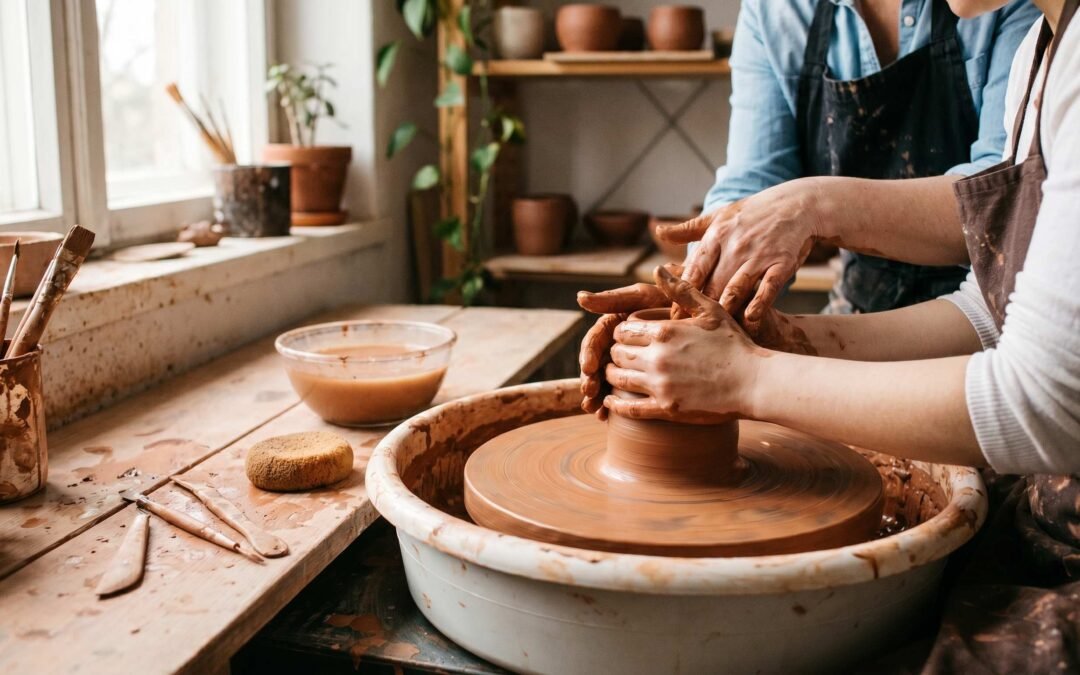
How to Make Pottery: A Complete Beginner’s Guide (2026)
Quick Answer: To make pottery, prepare and wedge your clay to remove air pockets, then shape it using a wheel or hand-building methods like pinch, coil, or slab. Let the piece dry slowly to leatherhard, then bone dry. Bisque fire at around 1830 to 1940 degrees Fahrenheit, apply glaze, then fire a second time to vitrify the surface and finish the piece.
Pottery looks intimidating from the outside. A spinning lump of clay rises into a vase, the potter’s hands barely moving, and the whole thing feels like magic reserved for art-school graduates. It isn’t. People have made pottery for at least 20,000 years using nothing more than hands, clay, and fire. You can start this week with $40 of materials and produce a finished mug by the end of the month.
This guide walks you through every decision you need to make: which method suits your goals, what equipment is actually necessary versus what marketing tells you to buy, and the realistic timeline from “I have never touched clay” to “I just pulled a finished bowl from the kiln.” We cover wheel throwing and the three hand-building methods, then give you a side-by-side comparison so you can pick the right starting point.
Two Ways to Make Pottery
Every pottery technique falls into one of two camps: wheel throwing or hand building. Wheel throwing uses a spinning surface to shape symmetrical, round forms through centrifugal force and pressure from your hands. Hand building uses only your fingers and simple tools to construct pieces from rolled, pinched, or stacked clay.
Most beginners assume wheel throwing is “real” pottery and hand building is a craft-store substitute. That’s wrong. Hand building has produced the finest ceramic art in human history, from Jomon vessels to contemporary studio work. Wheel throwing is faster for production work and excels at round symmetrical forms; hand building suits sculptural, angular, or asymmetric pieces. The right choice depends on what you want to make and how you learn.
| Method | Best For | Minimum Equipment Needed | Difficulty (1-5) | Cost to Start | Good For Making |
|---|---|---|---|---|---|
| Wheel Throwing | Beginners who want to make round, symmetrical pieces and don’t mind a steep learning curve | Pottery wheel, clay, basic trimming tools, bucket of water | 4 / 5 | $400 to $1,200 | Mugs, bowls, vases, cylinders, plates |
| Slab Building | Beginners who like measuring, planning, and geometric or architectural forms | Rolling pin, slab roller or wood guides, knife, ruler | 2 / 5 | $30 to $80 | Boxes, planters, tiles, dishes, lanterns |
| Coil Building | Beginners who want tall pieces and enjoy slow, meditative work | Hands, a smooth board, scoring tool, water | 2 / 5 | $25 to $60 | Large vessels, sculptural pots, urns |
| Pinch Pot | Total first-timers, kids, anyone testing the water before committing | A lump of clay and your thumbs | 1 / 5 | $15 to $30 | Small bowls, cups, decorative dishes |
If you’re undecided, start with a pinch pot. It costs almost nothing, takes 20 minutes, and teaches you how clay actually behaves under your hands. Anything you learn from that first lump of clay carries directly into wheel work later.
The 6 Steps to Make Any Piece of Pottery
No matter which method you choose, every piece of pottery moves through the same six stages. The forming step changes; everything else is identical.
Step 1, Choose and Prepare Your Clay
Clay comes in three main families: earthenware (red, low-firing, forgiving), stoneware (the workhorse of studio pottery), and porcelain (white, demanding, beautiful). For your first pieces, choose a mid-fire stoneware with a small amount of grog. It moves predictably on the wheel, builds well by hand, and survives early mistakes. See our full breakdown on the best clay for beginners for specific brand suggestions and our deeper guide to the different types of pottery clay if you want to understand the chemistry behind each option.
Buy clay from a ceramic supplier, not a craft store. A 25-pound bag costs $20 to $30 and yields roughly 15 to 25 small mugs. Store it sealed in plastic at room temperature. If it dries out, you can revive it by slicing it into chunks, soaking it overnight, and re-wedging.
Step 2, Wedge Your Clay
Wedging is kneading for clay. You press, fold, and rotate the lump for several minutes to align the clay particles, distribute moisture evenly, and crucially, eliminate air pockets. Skipping this step is the single most common rookie error. Our walkthrough on how to wedge clay properly shows the two standard techniques, ram’s head and spiral, with photos for each rotation.
Air pockets matter because they expand violently during firing. Trapped air can crack or even explode a piece inside the kiln, taking neighboring work with it. The clay body reference from Digital Fire explains how moisture and trapped gases interact during the firing curve, and why even invisible bubbles can rupture a wall at high temperatures. Wedge for at least 30 to 50 rotations. You’ll feel the clay grow uniform and slightly warm under your hands when it’s ready.
Step 3, Form Your Piece
This is the step that branches based on your chosen method. On the wheel, you center the clay, open it into a cylinder, and pull the walls upward and outward into your intended shape. Off the wheel, you use one of the three hand building pottery techniques: pinch, coil, or slab.
Aim for walls between 6 and 10 millimeters thick. Thinner walls dry too fast and warp; thicker walls take forever to dry and are more likely to trap moisture that explodes during bisque firing. Keep your hands wet on the wheel, dry on the bench when hand building. Water is your friend on the wheel; it’s the enemy when you’re scoring and joining coils or slabs.
Step 4, Dry Your Work
Pottery dries in two stages: leatherhard and bone dry. At leatherhard, the clay is firm like a hard cheese but still cool to the touch. This is when you trim feet, attach handles, carve decoration, and burnish surfaces. Most pieces reach leatherhard in 12 to 24 hours depending on size and humidity.
Bone dry comes next: the clay is pale, room temperature, and holds no moisture. A bone-dry mug feels light and chalky. This stage takes anywhere from 3 days for a small cup to 2 weeks for a large vase. Dry slowly under loose plastic for the first 24 hours, then uncovered. Fast drying causes cracks, warping, and surface tension issues. Patience here saves your work later.
Step 5, Bisque Fire
Bisque firing converts soft, fragile bone-dry clay into hard, porous ceramic. The kiln slowly climbs to around 1830 to 1940 degrees Fahrenheit (cone 06 to cone 04), driving off chemically-bound water and beginning to fuse the clay particles. The result is durable enough to handle, glaze, and fire a second time, but still porous enough to absorb glaze evenly.
If you don’t own a kiln yet, you have options. Many community studios offer firing services for $2 to $8 per piece. Our kiln guide for beginners covers electric, gas, and small tabletop options if you want your own. For complete kiln-free work, our guide to alternative firing methods covers oven firing, air-dry clay, and kiln-free approaches for home potters. The bisque firing science from Digital Fire explains what happens chemically at each temperature step and why a slow climb prevents cracking.
Step 6, Glaze and Glaze Fire
Glaze is liquid glass. You brush, dip, or pour it onto the bisque-fired piece, then fire again, this time hotter, to melt the glaze into a smooth, food-safe, water-tight surface. Most stoneware glazes mature between cone 5 and cone 10, roughly 2167 to 2381 degrees Fahrenheit.
Glaze application looks simple and ruins more pieces than any other step. Too thick and it crawls or runs; too thin and it goes dry and scratchy. Our complete walkthrough on pottery glazing for beginners covers brush, dip, and pour techniques along with the specific glazes that forgive early mistakes.
Making Pottery on a Wheel (Wheel Throwing)
Wheel throwing is a specific physical skill. Your body learns it the way it learns to ride a bike: clumsily for weeks, then suddenly with ease. Most beginners can produce a recognizable cylinder after 5 to 10 hours of practice, and a functional mug after 20 to 30 hours. The wheel rewards repetition more than talent.
The process breaks into five sub-steps:
Wedge. Same as any other method. Wedge a 1 to 1.5 pound ball for your first cylinders. Too little clay and you’ll struggle to feel the wheel’s resistance; too much and centering becomes physically exhausting.
Center. Slap the wedged ball firmly onto the spinning wheel head, then use your forearms braced against your thighs to press the clay into a stationary cone. The clay should become perfectly round and stop wobbling. This is the hardest part for most beginners; expect to spend your first session just learning to center.
Open. With the clay centered, press your thumbs (or two fingers) into the center to create a well. Open the well outward until you reach the desired base width, leaving roughly half an inch of clay at the bottom.
Pull walls. Place one hand inside, one outside, and squeeze gently while drawing your hands slowly upward. Each “pull” thins and raises the walls. Three to five pulls turns a thick puck into a tall cylinder.
Shape. Once you have a cylinder, you can belly it out into a vase, narrow it into a bottle, or flare it into a bowl. Shaping comes last because changing the form before the walls are thin enough will collapse the piece.
The most common beginner challenges are off-centered clay (causing wobble), uneven wall thickness (causing collapse), and too much water (also causing collapse). Keep the wheel slow, your movements deliberate, and a sponge handy to remove excess water from the inside of the piece.
For equipment, you don’t need to spend $1,500 on a Brent wheel for your first year. Entry-level wheels from Speedball and Shimpo run $400 to $700 and handle clay loads up to 25 pounds, well above what you’ll throw as a beginner. Our pottery wheel buyer’s guide compares the top entry-level models, and you can browse pottery wheels from Speedball directly for current pricing and specs.
Making Pottery by Hand (No Wheel Required)
Hand building requires almost no equipment and produces work that no wheel can match. Most contemporary ceramic artists hand build at least part of every piece, even when they own a wheel.
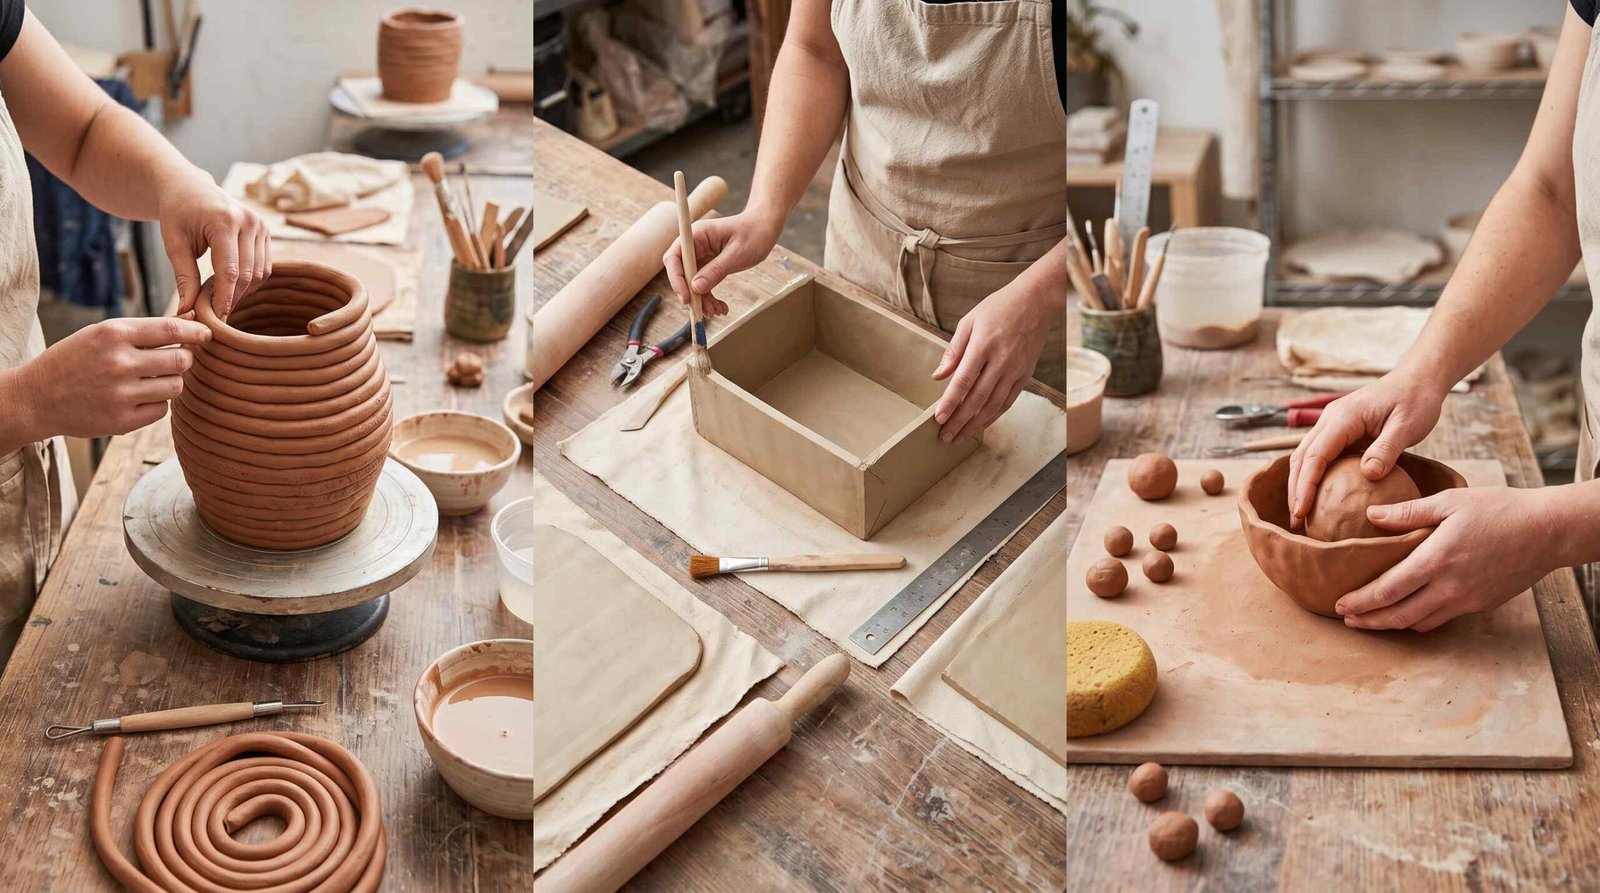
Coil Building
Coil building is the technique that built ancient Greek amphorae, Pueblo storage jars, and most of the world’s large historic vessels. You roll clay into long ropes, then stack them in spirals or rings, blending each coil into the one below.
Start with a slab base, then roll coils about the thickness of your finger. Score the top edge of the base, brush on a thin layer of slip (clay watered down to a yogurt consistency), and press the first coil down firmly. Smooth the inside and outside of each coil into the wall before adding the next. Done correctly, the wall looks seamless from the outside; the texture remains visible inside, which many potters intentionally preserve.
Coil building suits tall pieces, vessels with strong curves, and any work over 8 inches in height. It’s slower than wheel throwing, but it offers complete control over wall thickness and form. A 12-inch vase takes most beginners 2 to 3 hours of focused work.
Slab Building
Slab building uses flat sheets of clay (slabs) joined together into geometric shapes. You roll the clay to an even thickness using a rolling pin between two wood guides, cut your pieces, let them firm up slightly, then score and slip the edges to join them.
The technique excels at boxes, planters, tile work, and any piece with flat sides. A slab roller (which costs around $500) speeds up production, but a rolling pin and two half-inch wood strips do the job perfectly well at the beginner level. Slab building is the most architectural method, suiting potters who like planning, measuring, and assembling.
The trick to slab building is timing. Slabs that are too wet sag and distort; slabs that are too dry crack when bent or joined. Aim for soft leatherhard, firm enough to hold a shape, soft enough to take a score mark cleanly.
Pinch Pot
Pinch pots are the oldest pottery technique on Earth and the best place to begin. Take a ball of clay roughly the size of a tennis ball, press your thumb into the center, and gently pinch the walls between your thumb and fingers as you rotate the ball in your other hand. Walls thin, the bowl rises, and you’ve made pottery.
The technique teaches you everything: how clay responds to pressure, how moisture moves through a wall, how thickness affects drying. Many master potters use pinching for small functional pieces (tea bowls, sake cups, espresso cups) because the marks of the hand stay visible on the finished work, and that’s exactly the point. A finished pinch pot in skilled hands sells for hundreds of dollars; nothing about the technique is unsophisticated.
What You Need to Get Started (Equipment + Cost)
Pottery has a reputation for being expensive. It doesn’t have to be. The three setups below cover every realistic starting point, from “I want to try it this weekend” to “I’m building a serious home studio.”
| Setup Level | What You Need | Cost Estimate | Who It Suits |
|---|---|---|---|
| Complete Beginner (hand building, no wheel, no kiln) | 25 lb air-dry or oven-bake clay, rolling pin, knife, sponge, water bucket, smooth board | $40 to $80 | Anyone testing the craft for the first time, kids, apartment dwellers, people who don’t yet know they want to commit |
| Home Studio (wheel + kiln at home) | Entry-level wheel, small electric kiln (120V or 240V), wedging board, basic tools, splash pan, clay, glazes | $1,500 to $3,500 | Hobbyists who have taken a class or two and want to practice consistently at home |
| Serious Setup (full studio) | Pro-grade wheel, full-size 240V kiln, slab roller, extruder, ware racks, glaze chemistry stock, dedicated ventilation | $6,000 to $15,000+ | Production potters, professional artists, serious teachers |
If you’re starting today, the Complete Beginner setup is enough. Buy air-dry clay or oven-bake polymer clay, work through several pinch pots and small coil vessels, and only invest in a wheel or kiln once you’ve proven to yourself that pottery is something you want to do every week.
Whatever path you choose, these five tools belong in every beginner’s kit:
- Wire cutter: a length of wire with two toggles, used to slice clay from the bag and remove finished pieces from the wheel.
- Wooden ribs: shaped paddles for smoothing and shaping walls.
- Metal ribs: thinner and stiffer than wooden ribs, used for compressing and burnishing.
- Trimming tool: a loop tool for refining the foot of a piece at leatherhard stage.
- Sponge: small natural or synthetic sponge for managing water and smoothing.
Our complete walkthrough of the pottery tools for beginners guide covers each tool in detail, including which brands hold up and which fall apart inside a year.
How Long Does It Take to Make Pottery?
From wedging to finished piece, expect 2 to 4 weeks of calendar time per piece. Active hands-on time is far shorter: a small mug needs maybe 90 minutes of actual work spread across that timeline. The rest is drying and firing.
| Stage | Time Required | Notes |
|---|---|---|
| Clay prep (wedging) | 5 to 10 minutes per piece | Wedge in small batches; don’t wedge more than you’ll throw in one session |
| Forming (wheel or hand) | 15 minutes to 3 hours | A mug takes 15 to 30 minutes; a coiled vase can take 2 to 3 hours |
| Leatherhard drying | 12 to 36 hours | Trim feet and attach handles at this stage |
| Bone dry drying | 3 to 14 days | Slower is safer; small pieces dry faster than thick ones |
| Bisque firing | 8 to 12 hours plus cooling | Don’t open the kiln until it’s below 200 degrees Fahrenheit, usually 24 hours after firing |
| Glazing | 15 to 45 minutes per piece | Plus drying time before the next firing (usually a few hours) |
| Glaze firing | 10 to 14 hours plus cooling | Allow 24 to 36 hours total before unloading |
How long does it take to actually get good at wheel throwing? Realistic numbers: you’ll produce a functional cylinder within 10 to 15 hours of practice, a competent mug within 30 to 40 hours, and pieces you’re proud to give away around the 100-hour mark. Plan for at least a year of weekly practice before your wheel work feels reliably under your control. Hand building has a far shorter learning curve; most beginners produce a presentable coil vessel in their first or second session.
Common Beginner Mistakes (and How to Avoid Them)
| Mistake | Why It Happens | How to Fix It |
|---|---|---|
| Skipping or rushing wedging | Beginners think wedging is just busywork before the “real” pottery starts | Wedge 30 to 50 rotations every time; treat it as part of the practice, not a chore |
| Using too much water on the wheel | Fear of friction causing the clay to drag the hands | Use enough water to lubricate, no more; sponge out excess from inside the piece between pulls |
| Drying pieces too fast | Excitement about firing; piece left uncovered in dry warm air | Cover with loose plastic for the first 24 hours, then uncover gradually |
| Walls too thick | Caution; thick walls feel safer to handle | Aim for 6 to 10 mm walls; thick walls take longer to dry and risk cracking or exploding |
| Not scoring and slipping joins | Skipping the messy step when attaching handles or joining slabs | Always score both surfaces, apply slip, press firmly; joins that aren’t scored will crack at the seam |
| Glaze applied too thick | Assuming more glaze equals better color | Most glazes work best at the thickness of a postcard; test on a small piece first |
| Glaze on the foot of the piece | Inattention while dipping or brushing | Wipe the bottom inch of the piece clean before firing; glaze will fuse the piece to the kiln shelf otherwise |
Frequently Asked Questions
Can you make pottery at home without a kiln?
Yes. You have three main options. Air-dry clay produces decorative pieces that don’t need any firing but won’t hold water and shouldn’t be used for food. Oven-bake polymer clay hardens in a home oven and creates durable small items. For traditional ceramic clay, you can pit fire outdoors (essentially a controlled bonfire) or use a community studio’s kiln for $2 to $8 per piece. Air-dry is the simplest start, but most people who get serious eventually find a way to fire properly.
What type of clay is best for beginners?
A mid-fire stoneware with a small amount of grog. Stoneware is the workhorse of studio ceramics: forgiving on the wheel, durable in the kiln, and easy to glaze. Grog (pre-fired clay particles) adds structure that helps beginners avoid collapsing walls. Avoid porcelain at first; it’s beautiful but slumps under inexperienced hands. Avoid pure earthenware unless you specifically want low-fire reds and don’t plan to fire above cone 04.
How long does it take to learn pottery?
You’ll produce recognizable pieces within your first session. Functional pieces (a mug that doesn’t leak, a bowl that sits flat) usually arrive between 20 and 40 hours of practice. Confidence on the wheel takes around 100 hours, which most weekly hobbyists reach in 6 to 12 months. Mastery is a multi-decade pursuit, but you don’t need mastery to enjoy the craft or make pieces you use every day.
Do I need a pottery wheel to make pottery?
No. The three hand-building methods (pinch, coil, slab) require no wheel and produce work that stands alongside any wheel-thrown piece. Many professional potters work exclusively by hand. The wheel speeds up production of round symmetrical forms and offers a specific physical pleasure that some people find addictive, but it’s an option, not a requirement. Plenty of beginners spend their first year hand building before they ever touch a wheel.
How much does it cost to start making pottery?
Forty dollars covers a complete hand-building starter kit: clay, a rolling pin, basic tools, and a board to work on. A community studio class adds $150 to $400 and gives you access to wheels, kilns, and instruction. A home studio with wheel and kiln runs $1,500 to $3,500 for entry-level equipment. Production-grade studios start around $6,000. The good news is you can start at the $40 level and prove to yourself you’ll stick with it before spending more.
Why is pottery so hard at first?
Because clay is a material your body doesn’t know yet. Centering on the wheel requires specific muscle coordination that takes hours to develop. Reading the moisture content of a wall, knowing when to stop pulling, sensing the leatherhard moment for trimming, all of these are skills built through repetition, not instruction. Beginners often quit at the 5-hour mark because the wheel feels impossible. Push past 15 hours and something shifts. The clay starts cooperating. That’s when the craft becomes pleasurable instead of frustrating.