
Pottery Kilns for Beginners: The Complete Buying Guide (2026)
Choosing your first pottery kiln is the moment hobbyist potters become serious potters. It is also the biggest equipment purchase most of us ever make. After fifteen years behind the wheel and four kilns through my own studio, I can tell you the decision is simpler than the internet makes it look, but only once you understand the three variables that actually matter: size, type, and budget. This guide walks through each one, with real prices, real model names, and the honest tradeoffs nobody mentions in the showroom.
Quick answer: For most beginners, the right pottery kiln is a small electric kiln between 1.5 and 3 cubic feet, rated to cone 6 or higher, with a 240V single-phase plug. Expect to spend $1,200 to $2,200 for a quality model from Skutt, Paragon, or L&L. That size fits home studios, plugs into a standard dryer-style circuit, and will handle bisque and glaze firings for years.
Why Every Potter Eventually Needs a Kiln
Clay is just mud until it gets hot. A pottery kiln is the device that turns a soft, fragile bowl into permanent ceramic by heating it to between 1,800 and 2,400 degrees Fahrenheit. Without that heat, your work cracks, redissolves in water, or simply never becomes pottery.
Most new potters start by paying a local studio $5 to $10 per pound to fire their pieces. That works fine for a year. Then the math turns ugly. If you produce ten pounds of finished work a month, you are spending $50 to $100 just to fire it, plus the studio’s schedule constraints, plus the risk that your favorite mug gets dinged during transport. A home kiln pays itself off in roughly twelve to twenty months of regular use, and after that, your firings are essentially free except for electricity, which usually runs $4 to $8 per load.
There is also the creative argument. When you own the kiln, you control the temperature curve, the cooling rate, the atmosphere, and the schedule. You can fire a single test tile at 11 p.m. on a Tuesday. You can experiment with cone 04 low-fire glazes one week and cone 10 stoneware the next. That control is where craft turns into mastery.
The 3 Decisions Every Beginner Must Make
Forget the brand comparisons and the endless YouTube reviews for a moment. Before you look at a single model, you need to answer three questions in order. Get these right and the model almost picks itself.
Decision 1: Kiln Size (Cubic Feet)
Kiln size is measured in cubic feet of interior volume. The smallest hobby kilns hold about 0.5 cubic feet, roughly the size of a microwave. The largest home electric kilns reach 10 cubic feet, big enough for serious production. Beginners almost always overshoot or undershoot. Here is the honest sizing logic.
- 0.5 to 1 cubic foot (test kilns): Fine for jewelry, test tiles, or a single mug. Too cramped for real production. Skip unless you have a tiny apartment.
- 1.5 to 3 cubic feet (small studio kilns): The sweet spot for 90 percent of beginners. Fits eight to fifteen mugs per load, fires on a 240V household circuit, and stays small enough for a garage corner.
- 4 to 7 cubic feet (mid-size kilns): Production scale. Requires a dedicated 50-amp circuit and a real ventilation plan. Buy this only if you already know you want to sell.
- 8 to 10 cubic feet (large kilns): Studio and small-business territory. Three-phase power is sometimes required.
The rule we suggest to every new student: estimate how much you think you will fire, then choose one size up. You will grow into it within six months. Underbuying is the most common regret we hear from intermediate potters who outgrew a tiny test kiln in their first year.
Decision 2: Kiln Type (Electric vs Gas vs Wood)
There are three families of kiln fuel, and only one of them makes sense for a beginner.
Electric kilns are the practical choice for home studios. They plug into the wall, heat with electric resistance coils, and let you set a digital firing schedule and walk away. They top out around cone 10 (2,345 F), which covers everything from earthenware through high-fire stoneware. They cannot do true reduction atmosphere, but for 95 percent of beginner work, that does not matter.
Gas kilns burn propane or natural gas and reach high temperatures with a true reduction atmosphere, which is how potters get rich celadons and copper reds. They cost more, require outdoor venting, and need either a propane tank or a plumbed gas line. The starting price is $3,000 and goes up fast. A first-time potter does not need this.
Wood kilns are gorgeous. They produce surfaces nothing else can match. They also take 24 to 72 hours per firing, demand a cord of wood, require a permit in most counties, and need a partner to stoke. They are a destination kiln, not a starter kiln.
For the rest of this guide, we are talking about electric kilns. If you are reading a beginner’s guide, that is your answer.
Decision 3: Budget ($800 to $3,500+)
Here is what your money actually buys at each tier. These numbers reflect 2026 retail prices for new units shipped to your door.
- $800 to $1,200 (entry tier): Small 1.5 to 2 cubic foot kilns, often with a manual or basic digital controller. Brands include Olympic and entry-level Paragon. These work, but expect to replace elements in three to four years and live with simpler firing programs.
- $1,200 to $2,200 (sweet spot): The 2.5 to 3.5 cubic foot kilns most working hobbyists choose. You get a programmable digital controller, hard ceramic refractory, thicker brick, and elements that last five to seven years. Skutt KM-818, Paragon Caldera, L&L e23T-3 all live here.
- $2,200 to $3,500 (high-end home): Larger 4 to 7 cubic foot kilns with premium controllers, hard element holders (so you can replace elements yourself in twenty minutes), and the kind of insulation that drops electricity costs noticeably.
- $3,500 and up: Production gear. Three-phase, larger volume, vent systems built in. Most home potters never need this.
Budget honestly. Add 15 percent for shelves, posts, kiln wash, and a basic vent fan. A $1,500 kiln becomes a $1,800 total project once you have it usable.

Electric Kilns for Beginners: The Practical Choice
If you stopped reading here and bought a 2.5 cubic foot electric kiln from a reputable brand, you would do well. The reason electric dominates the beginner market is not just convenience. It is the predictability. Electric kilns fire the same way every time, which is exactly what a new potter learning glaze chemistry needs.
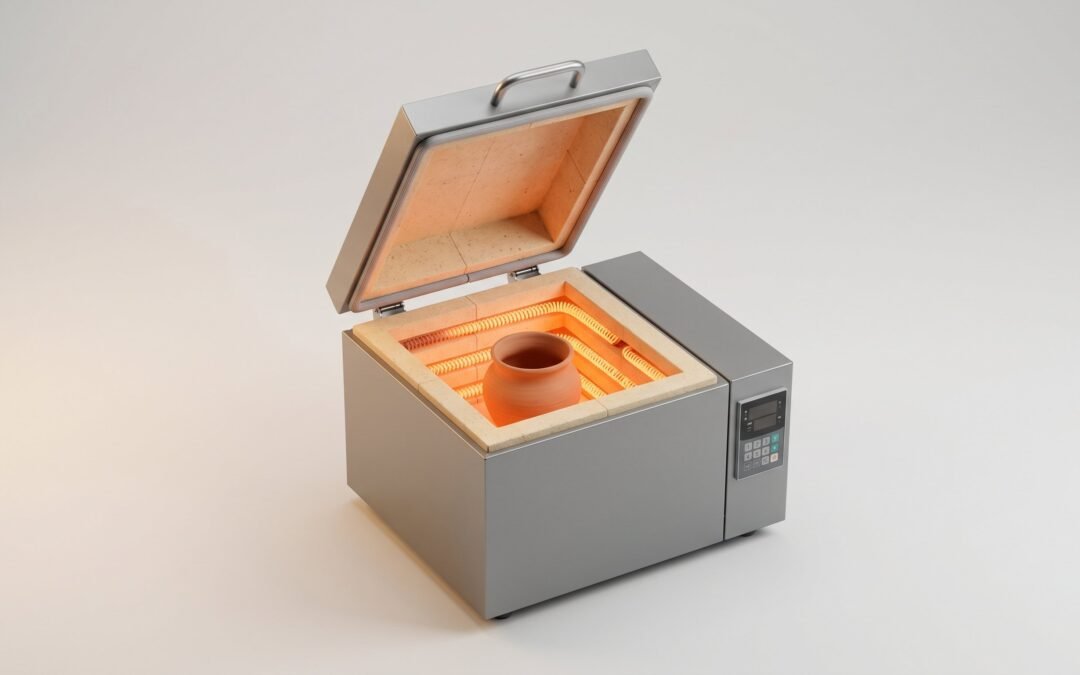
How Electric Kilns Work
Inside an electric kiln, coiled metal elements run around the interior walls. When you turn on the kiln, electricity passes through the coils, the coils glow, and the heat radiates onto the ceramic ware. A thermocouple, basically a temperature probe, reports the interior temperature to the controller. The controller compares that reading to your programmed schedule and tells the elements when to turn on, when to coast, and when to shut off.
Modern digital controllers, like the Bartlett Genesis or the Skutt KilnMaster touchscreen, store dozens of preset programs. You select “Cone 6 Slow Glaze,” press start, and walk away. Eight to ten hours later your firing is done and the kiln begins its overnight cool-down. There is no babysitting required, although you should check on it periodically and never leave home with an active firing in progress.
For more on the chemistry of what happens during firing, see our deep-dive on how to fire pottery, which walks through bisque, glaze, and cone selection in detail.
Top Electric Kiln Models for Beginners (with specs and prices)
The brands below are the four we actually see in working hobbyist studios. Pricing is approximate as of spring 2026.
- Skutt KM-818: 2.7 cubic feet, cone 10 capable, 240V/30A circuit, around $1,649. The default recommendation for most beginners. Reliable, easy to source replacement parts, excellent dealer network. Skutt’s official catalog lists current specs.
- Paragon Caldera: 1.0 cubic foot, cone 8, 120V plug, around $999. The rare kiln that runs on a normal household outlet. Tiny, but a real entry point.
- L&L Easy-Fire e23T-3: 4.5 cubic feet, cone 10, 240V/40A, around $2,395. Premium hard-element holders mean you can swap elements yourself in twenty minutes. Worth the upcharge if you plan to keep the kiln a decade.
- Olympic Doll Kiln: 0.65 cubic feet, cone 6, 120V plug, around $850. A real “first kiln” for tight spaces and small work.
- Brent EX-2336: 7 cubic feet, cone 10, 240V/50A, around $3,150. Step up when you are ready for production volume.
Comparison Table: Best Beginner Kilns at Every Budget
| Kiln Model | Cubic Feet | Max Temp | Price Range | Best For |
|---|---|---|---|---|
| Olympic Doll Kiln | 0.65 cu ft | Cone 6 (2,232 F) | $800 to $950 | Apartments, jewelry, tiny test pieces. 120V plug. |
| Paragon Caldera | 1.0 cu ft | Cone 8 (2,305 F) | $950 to $1,100 | Beginners on a tight budget or with 120V only. |
| Skutt KM-818 | 2.7 cu ft | Cone 10 (2,345 F) | $1,549 to $1,749 | The default beginner choice. Hobbyists and home studios. |
| Paragon Touch and Fire | 2.3 cu ft | Cone 10 (2,345 F) | $1,495 to $1,695 | Touchscreen controller fans. Strong value for the price. |
| L&L Easy-Fire e23T-3 | 4.5 cu ft | Cone 10 (2,345 F) | $2,295 to $2,495 | Serious hobbyists planning ten-year ownership. |
| Brent EX-2336 | 7.0 cu ft | Cone 10 (2,345 F) | $2,995 to $3,295 | Side-hustle potters edging toward small production. |
One note on availability. Kiln supply chains are still recovering from the 2024 freight disruptions, and lead times of six to ten weeks are normal. We suggest ordering at least two months before you actually need the kiln, and confirming the dealer can handle freight delivery to your address. A 200-pound kiln on a pallet is not a UPS shipment.
Setting Up Your Home Kiln Studio
You bought the kiln. Now where does it live? This is the part beginners chronically underestimate. A pottery kiln is not just an appliance. It draws 30 amps of continuous current, radiates intense heat, and emits gases you do not want to breathe. Setup matters.
Electrical Requirements (240V Circuit, Be Specific)
Most beginner kilns above 1.5 cubic feet need a 240V single-phase circuit. The exact amperage depends on the model. Read the spec sheet carefully.
- Small kilns under 1 cu ft: Often run on a standard 120V household outlet (15 or 20 amp). Convenient, but limits firing temperature.
- Mid-size 2 to 3 cu ft kilns: Usually require a 240V/30A circuit, often a NEMA 6-30 outlet, very similar to an electric dryer plug. Most homes can add this circuit for $400 to $700 with a licensed electrician.
- Larger 4 to 7 cu ft kilns: 240V/40A or 50A circuit, often hardwired. Add $800 to $1,500 for the install if your panel has capacity.
Critical detail: your kiln requires a dedicated circuit, meaning nothing else is on that breaker. Sharing a circuit with a freezer or shop tool is how breakers trip mid-firing and how partial firings ruin entire kiln loads. Pay the electrician, get it done right, and ask them to install the outlet within six feet of where the kiln will sit.
Ventilation and Safety
Firing clay releases sulfur dioxide, carbon monoxide, and small amounts of fluorine and chlorine compounds. None of this is good for your lungs. The two acceptable solutions are a downdraft vent system attached directly to the kiln (Skutt Envirovent and Vent-A-Kiln are the two most common, $300 to $550 installed) or siting the kiln in a detached, well-ventilated outbuilding with open airflow.
The kiln itself should sit on a non-combustible surface, at least 18 inches from any wall, with at least 36 inches of overhead clearance. Concrete floors are ideal. If your garage has a wood floor, lay down cement board topped with sheet metal. Keep a Class ABC fire extinguisher within ten feet, and never store flammables in the same room. The American Ceramic Society’s safety resources have detailed PDFs on kiln room layout if you want the engineering version.
Space Planning
Plan for the kiln plus a four-foot working zone around it. Add storage for kiln furniture (shelves, posts, stilts), kiln wash, a respirator, and heat-resistant gloves. Realistic total footprint: roughly 6 feet by 6 feet for a 3 cubic foot kiln setup. Garages, basements (if dry and ventilated), outbuildings, and dedicated studio sheds all work. Living rooms do not.
While you are designing the studio, think about the rest of your setup. A wheel will live nearby, and we cover pottery wheel costs separately. If you have not yet picked a wheel, our roundup of beginner pottery wheel kits pairs nicely with kiln planning.
Kiln Firing Basics: Cone System Explained
Now the question every new kiln owner asks: how do I actually fire this thing? The short version is that ceramic firing uses a measurement called the cone system, named after small pyramid-shaped pieces of clay that bend at specific temperatures.
Bisque vs Glaze Firing
Pottery is fired twice. The first firing, called the bisque, takes your dry greenware (bone-dry but unfired clay) up to roughly cone 04, which is 1,945 degrees Fahrenheit. This drives out the chemically bound water, hardens the clay, and turns it into a porous ceramic that can absorb glaze without falling apart.
The second firing, the glaze firing, melts the glaze you brushed or dipped onto the bisqueware. The temperature depends on the clay body and the glaze. Stoneware glazes typically mature at cone 5 or 6 (around 2,165 to 2,232 F). Porcelain often goes to cone 10 (2,345 F). Earthenware stays lower, around cone 04 to cone 06.
The order matters: bisque first, then glaze. Reversing them ruins both the work and the kiln shelves. For a refresher on which clays go with which firing schedules, see our guide to types of pottery clay.
Cone 06 to Cone 10: What Beginners Need
Cone numbers confuse beginners because they run backward at one end of the scale. Cones below “1” are written with a leading zero, and bigger numbers mean lower temperatures. Cone 022 is colder than cone 06, which is colder than cone 1, which is colder than cone 10. Memorize the four reference points and you have it.
- Cone 06 (1,830 F): Standard bisque firing temperature.
- Cone 04 (1,945 F): Earthenware glaze maturity.
- Cone 6 (2,232 F): Mid-fire stoneware glaze maturity. Most popular range for hobbyists.
- Cone 10 (2,345 F): High-fire stoneware and porcelain.
If your kiln is rated to cone 10, you can fire anywhere below that. We suggest beginners start with cone 6 work, because the glaze chemistry is forgiving, the clay is widely available, and you are not pushing the kiln near its rated maximum every firing, which extends element life dramatically.
Common Beginner Mistakes When Buying a Kiln
Across the last decade of teaching, we have seen the same mistakes recur. Avoid these and you will save thousands.
- Buying too small. The number-one regret. A 0.65 cubic foot kiln feels charming for two months and then becomes a bottleneck. Buy one size up from what you think you need.
- Skipping the dedicated circuit. Plugging a kiln into a circuit shared with a freezer is asking for ruined firings. Spend the $500 on the electrician.
- Ignoring ventilation. A vent system seems optional until you smell the off-gassing. Install it on day one.
- Buying used without inspection. Used kilns can be great deals, but check the elements, brick, controller, and lid hinges before money changes hands. Replacement elements alone run $200 to $400.
- Forgetting the shelves and posts. Kiln furniture is rarely included. Budget $150 to $300 for a starter set of shelves, posts, and kiln wash.
- Choosing cone 6 limits when cone 10 is $100 more. Always buy the higher-rated kiln if the price difference is small. You will grow into the firing range.
- Underestimating delivery. Freight delivery to a residential address with no loading dock costs $150 to $400. Confirm before you click buy.
FAQ
How much does a beginner pottery kiln cost?
A quality beginner electric kiln runs $1,200 to $2,200 new, with the most popular models, like the Skutt KM-818 or Paragon Caldera, landing in the $1,500 to $1,700 range. Budget another $200 to $400 for kiln furniture, kiln wash, and a vent fan. Total realistic startup cost is around $1,800 to $2,500.
Can I fire a kiln at home?
Yes, with proper setup. You need a dedicated 240V circuit installed by a licensed electrician, a vented location (garage, basement, or outbuilding), and at least 18 inches of clearance around the kiln. Most homes can accommodate a 2 to 3 cubic foot electric kiln without major modifications.
What size kiln do I need as a beginner?
For most beginners, a 2 to 3 cubic foot kiln strikes the right balance. It holds 8 to 15 mugs per load, runs on a household-style 240V circuit, and gives room to grow. Going smaller (under 1 cubic foot) often leads to early upgrades, while going much larger (5 cubic feet or more) is overkill until you sell regularly.
What is the difference between bisque and glaze firing?
Bisque firing is the first firing, typically to cone 04 or 06, which hardens raw clay into a porous ceramic that can absorb glaze. Glaze firing is the second firing, at a higher temperature matched to your glaze and clay, that melts the glaze onto the bisqueware. Pottery is almost always fired twice.
How long does a kiln firing take?
A typical bisque firing takes 8 to 12 hours of active firing, followed by 10 to 18 hours of cool-down before you can open the kiln. A glaze firing is similar, sometimes a bit shorter on the way up. Plan for roughly 24 hours from start to unloading. Never open the kiln above 200 F or you risk thermal shock cracking.
Do I need a kiln if I use air-dry clay?
No. Air-dry clay hardens at room temperature through evaporation and never needs firing. The tradeoff is that it stays porous, breaks more easily, and cannot hold water long-term. If you want functional pottery (mugs, bowls, dinnerware), you need real ceramic clay and a kiln.
A pottery kiln is the single piece of equipment that unlocks the rest of the craft. Pick a reputable brand in the 2 to 3 cubic foot range, install it on a dedicated 240V circuit with a vent, and you will fire thousands of pieces over the next decade. The first firing is the hardest. After that, you stop being a person who makes pots and become a potter.