
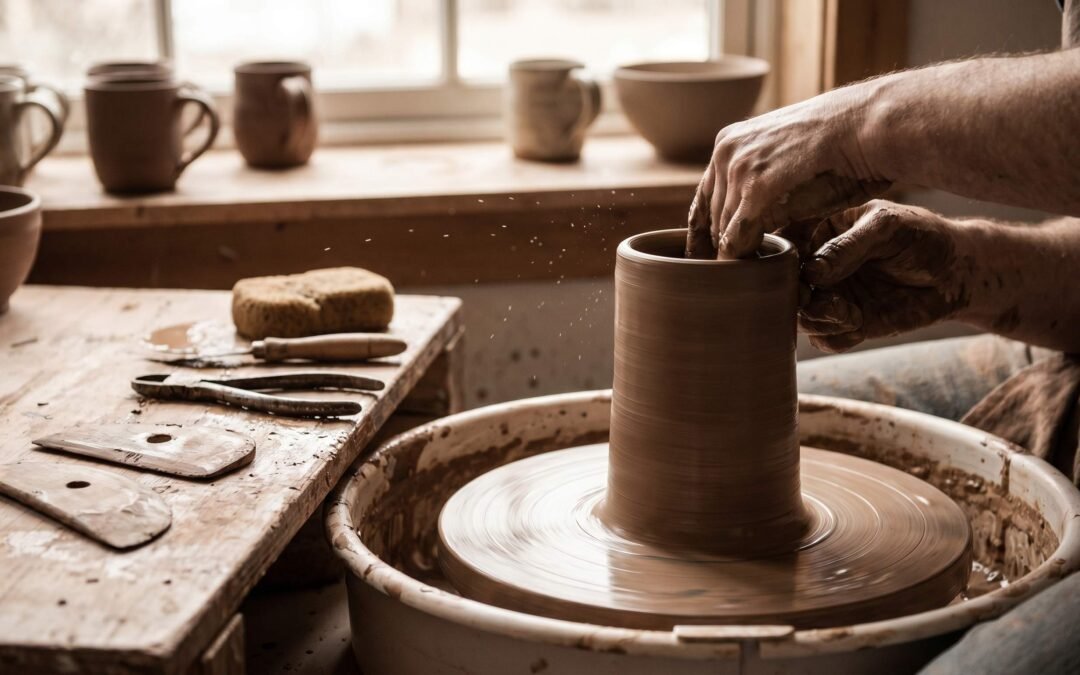
How to Make a Mug on a Pottery Wheel: Step-by-Step Guide
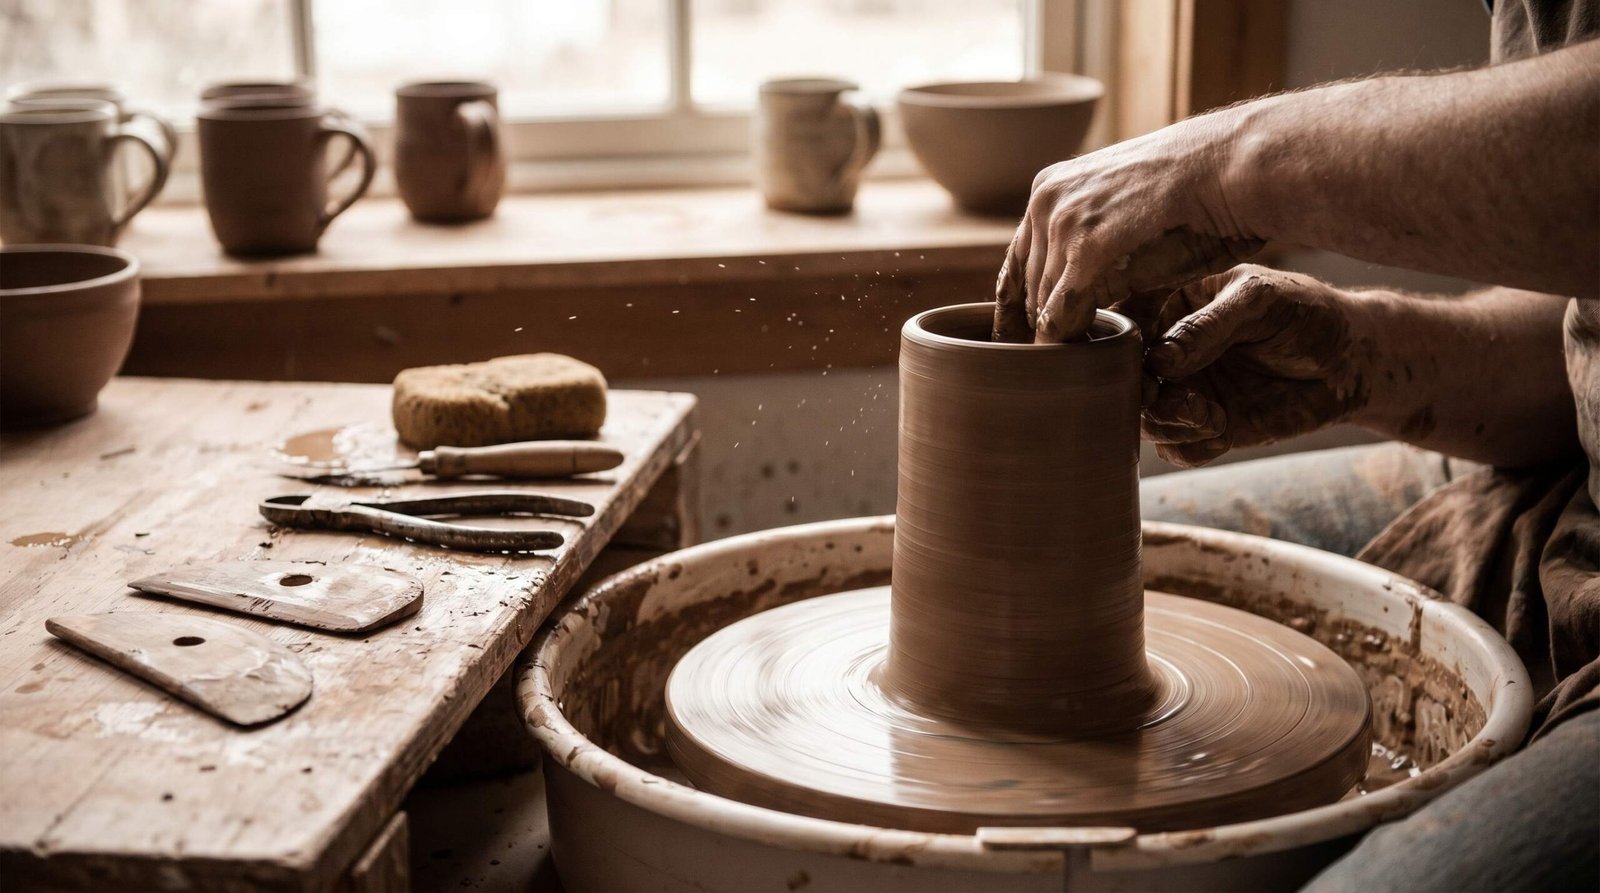
A pottery mug is the first functional form most wheel throwers tackle, and for good reason. It teaches centering, wall pulling, trimming, and handle attachment in one project. The catch: a mug has to feel right in the hand, hold liquid without leaking, and survive a kiln cycle. That means precision matters more than it does on a decorative bowl. This guide walks through the full process, including the shrinkage math most tutorials skip and the troubleshooting beginners actually need.
What You Need Before You Start
Pottery throwing rewards preparation. Before you sit at the wheel, sort out three things: the right clay body, a small set of essential tools, and a clear understanding of how much your finished piece will shrink.
Choosing Your Clay
For a first mug, we suggest a smooth stoneware in the cone 6 range. Stoneware is forgiving, vitrifies fully so the mug holds liquid without seeping, and tolerates the bumps and presses of a beginner’s hands. Porcelain is tempting because of how it looks fired, but it slumps easily, shrinks more, and punishes anyone who hasn’t logged hours at the wheel. Earthenware works for decorative mugs but stays slightly porous unless the glaze fully seals it, so it’s a less reliable choice for everyday coffee use.
A grogged stoneware (clay with small particles of fired clay mixed in) holds its shape during throwing and resists S-cracks during drying. If you’re brand new, start there. For a deeper look at what to buy, see our guide to the best pottery clay for beginners.
Tools You’ll Need
You don’t need a full studio kit to throw a mug. Six tools cover everything in this tutorial:
- Wire cutter for slicing the mug off the bat and for cutting wedged clay portions
- Wooden rib for shaping and compressing walls
- Metal rib for smoothing and finishing the exterior
- Sponge for water control and rim smoothing
- Needle tool (pin tool) for trimming the rim level and checking wall thickness
- Trimming tool (loop or ribbon style) for cutting the foot ring once the mug is leather-hard
A chamois leather strip for finishing rims is a worthwhile extra. For the full kit breakdown, our roundup of pottery tools for beginners covers what’s worth buying first and what can wait.
Shrinkage Math
Clay shrinks twice: once as it dries to bone-dry, and again when it fires. Skip this math and you’ll end up with espresso cups when you wanted coffee mugs.
Most stoneware bodies typically shrinks about 6% when drying, then loses an additional 5-6% when fired to maturity. Add those together and you’re looking at 12-14% total shrinkage from wet clay to finished mug. Porcelain runs higher, often hitting 14-15% total because the fine particles pack more tightly during firing.
Here’s how to translate that into throwing dimensions:
- Volume: Want a finished mug that holds 12 oz (about 350ml)? Throw the cylinder roughly 13% larger, around 13 oz wet capacity. A 16 oz target means throwing for about 18 oz.
- Height: Want a 4-inch finished mug? Throw to 4.5 inches wet.
- Width: Want a 3.5-inch finished diameter? Throw to about 4 inches wet.
The exact shrinkage rate varies by clay body. The bag your clay came in usually lists the manufacturer’s shrinkage percentage at specific cones. If you’re serious about consistency, throw a test bar, mark it at 100mm wet, then measure after firing. That number is gold for every future piece you make in that clay.
Step 1 – Prepare and Wedge Your Clay
Cut a piece of clay weighing about 1 pound (450g) for a standard 12 oz mug. Use 1.25 pounds if you want a beefier 16 oz mug. Beginners often start with too little clay, which leaves no margin for error when pulling walls.
Wedge the clay thoroughly. Wedging removes air bubbles, evens out moisture, and aligns clay particles so the mug throws and dries uniformly. Air bubbles trapped in poorly wedged clay can cause walls to collapse mid-throw or blow holes in the kiln. If you’re new to wedging, our walkthrough on how to wedge clay covers the ram’s head and spiral methods in detail.
After wedging, shape the clay into a smooth ball and slam it down onto the wheel head or bat. Slam it hard. A clay ball that hits dead center saves you 30 seconds of centering struggle every time.
Step 2 – Center the Clay on the Wheel
Centering is the foundation of every wheel-thrown piece. Get this wrong and every step after it fights you.
Start the wheel at full speed. Wet your hands and the clay. Lock your elbows against your hips for stability, then squeeze the clay inward and upward with both hands. The clay will rise into a cone shape. Once coned, press straight down with the heel of your left hand while your right hand cups the side, forming a dome about 3 inches tall.
Cone up and down two or three times. This further aligns particles and confirms the clay is centered. When the clay spins smoothly with no wobble visible under your hands, you’re done. Touch it lightly with a fingertip held still: a centered piece feels glass-smooth, while an off-center piece bumps your finger rhythmically.
Step 3 – Open the Base
With the wheel still spinning fast, press both thumbs into the top center of the clay dome. Push down slowly and steadily, leaving about 1/4 inch of clay at the bottom. Use a needle tool to check thickness: insert it straight down until it stops, mark the depth with your thumb, then pull out and measure. Adjust until you have a flat floor approximately 6-7mm thick.
This is also when you compress the floor. With your fingertips or a wooden rib, press down firmly on the bottom while the wheel spins. Compressing the floor aligns clay particles in the base and is the single most effective step in preventing S-cracks during drying. Don’t skip it.
Once the floor is set, widen the opening by pulling outward from the center with your fingers, leaving a base diameter of about 3.5 to 4 inches (remember, this will shrink). Square off the corner where floor meets wall using a finger held perpendicular to the base. A sharp inside corner is much easier to clean up later than a sloping one.
Step 4 – Raise the Walls
Slow the wheel down to about half speed for pulling walls. Wet the clay so your hands glide without dragging.
Place your right hand inside the cylinder with fingertips at the base. Place your left hand outside, knuckles pressed against the clay at the same height. Squeeze gently and lift both hands upward in a slow, continuous motion. The clay between your hands moves up, raising the wall. Try to use a wooden tool or the side of your knuckle for the outside pull, since fingertips can dig grooves.
Most beginners need three to four pulls to get full height. After each pull, collar the cylinder gently with both hands wrapped around the outside to bring the wall back inward (clay naturally wants to flare out as it rises). Re-wet between pulls.
Aim for a wall thickness of 6-7mm (about 1/4 inch). This is the sweet spot for a functional mug. Walls thicker than 10mm feel heavy in the hand, drink more glaze, and take longer to fire. Walls thinner than 4mm are fragile, crack easily during drying, and can warp in the kiln. Check thickness with a needle tool inserted from the outside through the wall, marking the depth with your thumb.
Throw the mug about 4.5 inches tall if you want a 4-inch finished piece. The cylinder should be slightly taller and slightly wider than your target dimensions, accounting for shrinkage.
Step 5 – Shape the Mug Form
A straight cylinder makes a fine mug, but a subtle shape elevates the piece. Most mug shapes fall into two camps: a slight outward flare at the rim, or a gentle inward taper that holds heat better.
To shape, use your fingertips inside the wall while a wooden rib presses gently outside (or vice versa). Push outward at the belly for a soft curve, or collar inward near the top for a tapered drinking edge. Move slowly. Once the wall starts moving, it’s harder to control than during pulling.
Clean up the rim with a chamois. Fold a damp strip of chamois leather over the rim, hold it lightly between thumb and forefinger, and let the wheel spin under your grip for several rotations. The chamois evens out the rim, rounds sharp edges, and gives the mug a smooth lip. A clean rim is what makes a mug feel professional.
If the rim is uneven or higher on one side, level it with a needle tool. Hold the needle tool steady against the spinning rim, push it through the clay until it meets your supporting finger inside, then lift off the cut ring. Smooth the new rim with chamois.
Step 6 – Trim the Foot Ring
Trimming happens after the mug stiffens to leather-hard (about 12 to 24 hours later, depending on humidity). Leather-hard clay feels firm to the touch but is still slightly cool and slightly pliable. If you can press your thumbnail in without much resistance, it’s not quite there yet. If the clay feels dry and hard, you’ve waited too long.
Flip the mug upside down and re-center it on the wheel head. Use small coils of soft clay around the base to hold it in place. Turn the wheel slowly and use a loop or ribbon trimming tool to cut a foot ring: a slight recess in the center of the base with a raised ring around it. The foot ring lifts the mug off the table, hides the cut-line from the wire, and adds visual lightness.
Aim for a foot ring about 1/4 inch wide and 1/8 inch tall. The recess inside should be shallow enough that the base doesn’t get fragile. Compress the inside of the foot with a wooden rib to prevent cracking.
For a complete walkthrough of trimming the foot ring, including chuck centering for tall pieces, see our dedicated trimming guide.
Safety note: Trimming dry clay produces fine dust that contains silica. Inhaling silica dust over years contributes to silicosis, an irreversible lung disease. Always trim when clay is still leather-hard (which produces moist ribbons rather than dust), wear a properly fitted P100 or N95 respirator when handling any dry clay, and wet-mop your studio floor instead of sweeping. The long-term silica dust risk in pottery is real but largely preventable with consistent habits.
Step 7 – Pull a Handle
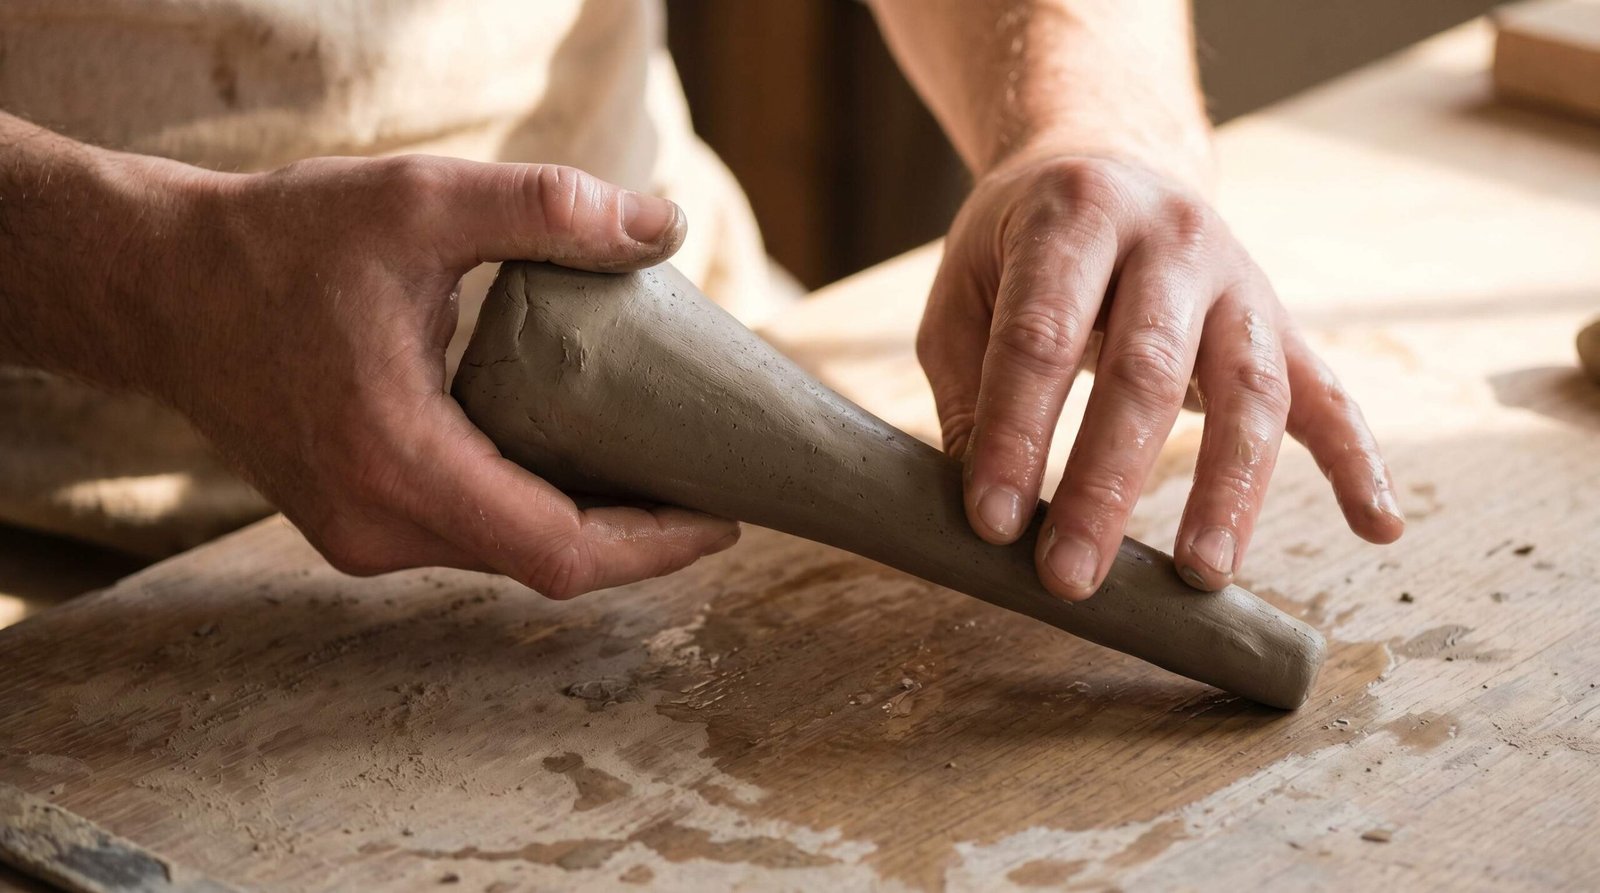
Pulling a handle from a lug is the most common technique and produces the best, most organic handle shape. A lug is a thick carrot-shaped piece of clay held vertically while you draw a handle down from it with wet hands.
Wedge a fist-sized piece of clay and shape it into a tapered carrot, fat end up. Hold the fat end in your non-dominant hand, fat end up, with the tail hanging down. Wet your dominant hand thoroughly. Wrap your wet thumb and forefinger around the tail, then pull downward in a smooth stroke. The clay stretches and thins between your fingers, forming a ribbon-like strap.
The first pull won’t look like much. Re-wet your hand and pull again, three or four times total, until you have a strap of even thickness with a slight curve to its cross-section. Shape your fingers to control the cross-section: a flat strap feels uncomfortable in the hand, while one with a slight teardrop or D-shape feels right.
For a 12 oz mug, the handle strap should be about 3.5 inches long and 5/8 inch wide, with a 1/4 inch thickness at the center. These dimensions vary based on mug size and your hand. For detailed guidance on handle thickness and ergonomics, Ceramic Arts Network has a strong reference piece.
Once the handle strap is pulled, cut it free with a wire and lay it on a wooden board. Let it stiffen to soft leather-hard, about 30 minutes to an hour, before attaching. A too-wet handle will sag and pull away from the mug as it dries.
Step 8 – Attach the Handle
Both the mug and the handle should be at the same leather-hard stage when you attach. This is critical. A wet handle attached to a leather-hard mug will dry faster than the mug, contract more than the mug, and crack at the join or fall off entirely. Letting both pieces match in moisture is the single biggest factor in handles that stay attached.
Mark where the handle will sit. Top attachment goes about 1/2 inch below the rim. Bottom attachment goes about 1 inch above the base. The handle should pull straight down from the top attachment in a relaxed curve, then sweep into the lower attachment point. Hold the handle against the mug to confirm position before attaching.
Score both surfaces. Use a needle tool or serrated rib to scratch crosshatch marks into the mug at the attachment points and onto the handle ends. Apply slip (clay mixed with water to a creamy consistency, sometimes called magic water if vinegar is added) to both scored areas. Press the handle firmly onto the mug, top first, then curl the bottom into position and press into place.
Smooth the join with a damp finger or small wooden tool. Don’t smear too aggressively or you’ll thin the wall at the attachment. A small fillet of clay smoothed into the join strengthens it considerably.
Let the attached handle set under controlled drying. Cover the mug loosely with plastic for the first 24 hours so the handle and mug equalize in moisture. Many potters wrap just the handle and rim with a strip of plastic to slow those areas without trapping moisture on the whole piece.
Step 9 – Drying, Bisque Firing, and Glazing
Slow drying matters. Cover the mug loosely with plastic for the first 24 to 48 hours, then uncover and let it dry to bone-dry over another two to four days. Bone-dry clay is lighter in weight, room temperature to the touch (not cool), and looks chalky. Rushing this stage cracks rims and bases.
Bisque fire to cone 06 (around 999°C / 1830°F). The bisque fires the clay to a hard but porous state that absorbs glaze readily. Load the mugs upright in the kiln, not touching each other or the kiln walls. Bisque firing takes about 8 to 12 hours, including a slow ramp at the start to drive off any remaining moisture.
After bisque, glaze the mug. Dip, brush, or pour glaze onto the surface, keeping the foot ring clean so the mug doesn’t fuse to the kiln shelf. Wax resist on the foot before glazing makes cleanup easier. For a step-by-step approach to glazing your mug, including dip vs. brush techniques, see our beginner glaze guide.
Glaze fire to the clay’s recommended temperature, usually cone 6 (around 1222°C / 2232°F) for mid-range stoneware. The glaze melts, fuses to the clay, and creates the finished waterproof surface. This firing also drives the final shrinkage and brings the clay to full vitrification.
Common Mug Problems and How to Fix Them
Most beginner mug problems trace back to a small handful of root causes. Use this table to diagnose what went wrong and adjust your next attempt.
| Problem | Cause | Fix |
|---|---|---|
| S-crack in the base | Floor not compressed during opening; clay particles pulled outward leave a weak center that splits during drying. | Compress the floor with fingers or a wooden rib after opening. Dry the mug slowly and evenly. Use a grogged clay body to reduce drying stress. |
| Handle falls off | Wet-to-wet or wet-to-bone-dry attachment. Differential drying pulls the handle away from the mug. | Attach when both mug and handle are at the same leather-hard moisture. Score deeply on both surfaces and use slip. Cover loosely with plastic for 24 hours after attachment. |
| Walls too thin | Threw with too little clay or pulled too aggressively; off-center clay forces uneven thinning. | Use 1 pound of clay minimum for a 12 oz mug. Center thoroughly before opening. Pull walls in three to four controlled passes, not one or two hard ones. |
| Wobbly or uneven rim | Cylinder went off-center during a pull, or one side of the wall is taller than the other. | Level the rim with a needle tool while the wheel spins. Smooth with chamois. Collar gently between pulls to keep the wall vertical. |
| Cracked rim | Rim dried faster than the rest of the mug. Thin walls dry edges-first, which crack as the body shrinks. | Cover the rim loosely with a strip of plastic during initial drying. Slow the dry. Smooth the rim with chamois to compress the clay and remove micro-cracks. |
| Handle cracked during drying | Mug and handle at different moisture levels when attached; the wetter piece shrank more. | Match leather-hard stages before attaching. Cover the joined piece with plastic for 24 hours. Pull handles from clay of the same age and bag as the mug. |
| Mug feels too heavy | Walls thicker than 10mm; foot ring too thick or undefined. | Target 6-7mm walls. Trim a true foot ring with relief in the center. Weigh finished bisque mugs and aim for consistency batch to batch. |
One more troubleshooting note that doesn’t fit the table: if your mug warps during firing, the cause is usually uneven wall thickness. Thicker zones shrink less than thinner ones, and the imbalance pulls the form sideways. Keep wall thickness consistent from base to rim, and warping drops away on its own.
FAQ
How long does it take to make a mug?
Active throwing takes 15 to 30 minutes for a beginner. The full process, including trimming the next day, handle attachment, drying time, and two firings, takes 10 to 14 days from wet clay to finished mug. Most of that is unattended drying and firing time.
How much clay do you need for a mug?
About 1 pound (450g) of wedged clay for a 12 oz finished mug. Bump up to 1.25 pounds for a 16 oz mug. The handle uses an additional 1/4 pound or less. Plan for 1.5 pounds total per mug to give yourself margin.
How big should the handle be on a pottery mug?
For a standard 12 oz mug, the handle opening should comfortably fit two fingers, roughly 1.25 inches of clear space inside the curve. The strap itself should be 5/8 inch wide and 1/4 inch thick at the center. Bigger mugs deserve bigger handles. Test ergonomics by holding the leather-hard handle against the mug before attaching.
Why does my pottery mug handle fall off?
Almost always because the mug and handle were at different moisture levels when joined. The wetter piece shrinks more during drying, pulling away from the drier one. Match leather-hard stages before attaching, score both surfaces deeply, use slip, and cover the joined piece with plastic for the first 24 hours to equalize moisture.
How thick should pottery mug walls be?
Target 6-7mm (about 1/4 inch) for a functional mug. Thicker than 10mm feels heavy and holds heat poorly. Thinner than 4mm is fragile and prone to cracking during drying or firing. Check thickness during throwing by inserting a needle tool from the outside until it meets your finger inside.