
How to Trim Pottery: The Complete Beginner’s Guide
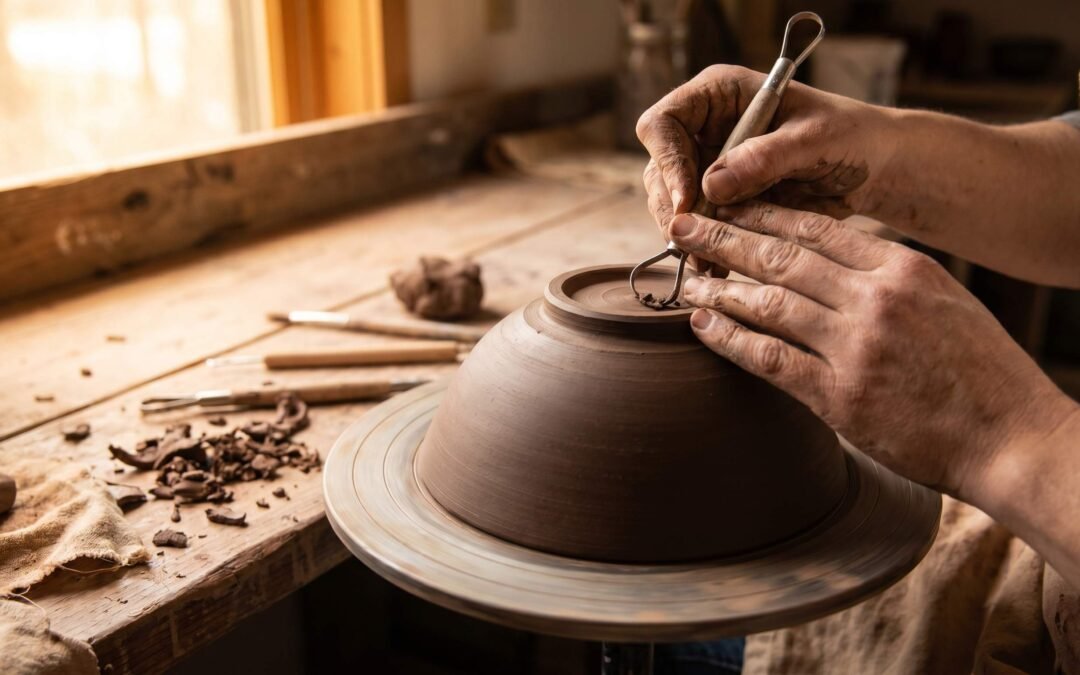
Quick Answer: Trimming pottery is the process of refining a leather-hard piece on the wheel, carving away excess clay to shape a foot ring, thin the walls, and finalize the form. You re-center the piece upside down, secure it to the bat, and use loop, ribbon, or wire tools to shave clay in controlled passes until the profile feels balanced and the foot reads cleanly.
Throwing the pot is only half the job. The trimming stage is where a heavy, bottom-thick lump turns into a piece that lifts comfortably, rings true on the shelf, and shows off a foot ring you actually want to sign. We have spent years at the wheel teaching students this exact moment, and we know how nerve-wracking that first pass with a loop tool can feel.
This guide walks you through every part of trimming pottery, from reading the clay’s moisture to choosing the right tool, fixing chatter, and rescuing a base you almost cut through. By the end you will trim with confidence and a steady hand.
What Is Trimming in Pottery?
Trimming, sometimes called turning in British studios, is the controlled removal of clay from a thrown pot after it has stiffened to a leather-hard state. The piece goes back on the wheel upside down, gets re-centered, and the potter shaves away excess weight on the bottom and lower walls. The goal is threefold: shape a foot ring that lifts the pot off the surface, balance the wall thickness from rim to base, and refine the overall silhouette.
When you throw a cup or bowl, the base is usually thicker than the walls. This extra clay gives you something to grip with the wheel and keeps the form from collapsing. Trimming removes that bottom bulk so the finished piece feels right in the hand. A well-trimmed pot also fires more evenly because the walls have consistent thickness, reducing the chance of cracks from uneven shrinkage.
Trimming is not the same as carving. Carving adds decorative texture or pattern. Trimming is structural, focused on weight, wall, and foot. Many potters do both, but the order matters: trim first, then carve.
There is also a quiet emotional shift that happens in trimming. Throwing is energetic, fast, and physical. Trimming asks you to slow down, listen to the sound of the tool against the clay, and trust small moves. Some studios call it the meditative half of pottery, and students who skip trimming often miss the moment where a pot really becomes their own.
When to Trim: Identifying Leather-Hard Clay
The single biggest factor in successful trimming is moisture. Trim too wet and the clay smears, drags, and tears. Trim too dry and the surface chatters, crumbs, and refuses to take a clean cut. The sweet spot is called leather-hard.

Leather-hard clay feels cool to the touch but no longer sticky. Press your thumbnail into the rim. If it leaves a clear mark with no clay sticking to your nail, you are close. The piece should still feel slightly damp, almost like a cold piece of cheddar, firm enough to hold its shape upside down but soft enough to carve cleanly.
How long this takes depends on your studio. In a warm dry room, a cup may reach leather-hard in three to four hours. In a humid basement, it could take overnight. Cover pieces loosely with plastic to slow drying if you need more time, or leave them uncovered on a board if you need to speed it up. We suggest checking every hour the first few times you trim, just to learn the feel.
A common mistake is trimming a piece that is too dry at the rim but still wet at the base. The thinner walls dry faster than the thick bottom. If the rim is bone-dry while the base is still soft, wrap just the rim in plastic and wait a few hours for the moisture to even out.
There are a few quick tests we use in the studio. The tap test: flick the side of the pot with a fingernail. A soft thud means too wet; a clear ring means too dry; a short bright tone with a touch of resonance means you are ready. The shadow test: hold the pot under good light and look at the rim. If the clay reads dull and uniform, the surface is still wet. If you see a faint highlight along the edge, the water has started leaving the surface and the piece is approaching leather-hard. With practice these tests become automatic.
Different clay bodies behave differently. Stoneware gives you a forgiving window of one to two hours where the body trims well. Earthenware moves through leather-hard faster because it holds less water. Porcelain has the narrowest window of all, sometimes only thirty minutes, which is why porcelain potters often trim multiple pieces in a batch as soon as the first one reads ready. If you are still figuring out which clay suits your work, our overview of different types of pottery clay and their uses walks through the trade-offs.
Tools for Trimming Pottery
Walk into any pottery studio and you will see a drawer full of trimming tools, each with a slightly different shape. The three main categories are loop tools, ribbon tools, and wire tools. Each cuts clay differently and suits different jobs. If you are still building your kit, our guide to pottery tools for beginners covers the broader starter set you should own.
Tool selection has a real effect on the surface you leave behind. For a deeper look at how blade geometry changes the cut, see this overview of pottery trimming techniques from a leading toolmaker.
| Tool Type | Best For | Technique | Pros | Cons | Price Range |
|---|---|---|---|---|---|
| Loop Tools | Heavy clay removal, rough shaping, carving foot rings | Hold at a low angle, let the loop scrape clay in long shavings | Aggressive, fast, durable; great for thick bases | Can drag if too dull; less precision on fine curves | $8 to $25 |
| Ribbon Tools | Fine finishing, smooth profiles, refining a foot | Use the flat ribbon edge with light pressure for thin shavings | Leaves a smoother surface; excellent control on curves | Slower clay removal; ribbon can bend with too much force | $10 to $30 |
| Wire Tools (wire-end) | Carving foot ring details, undercutting, hollowing | Use the looped wire to pull through firm clay in pulled strokes | Cuts cleanly through stiff leather-hard; great detail | Wire can stretch or break; less suited to large surfaces | $6 to $20 |
Beyond these three, most potters keep a needle tool for marking, a sponge for cleaning surfaces, and chuck or coddle setups for awkward shapes. A bat with bat pins or a chuck (a soft thrown ring used to cradle a vase) lets you trim narrow-mouthed forms without crushing the rim.
How to Trim Pottery: Step-by-Step
The process below works for a standard cup or bowl. Adjust speed and pressure based on how the clay responds. If you are new to the wheel itself, our walkthrough of how a pottery wheel works covers the mechanics that make trimming possible.
- Confirm leather-hard. Press your nail into the rim and the base. Both should mark cleanly with no smear. If the base is still soft, wait.
- Clean your bat. Wipe the wheel head or bat with a damp sponge to remove old clay slivers that might catch your piece.
- Invert the piece. Flip the pot upside down and place it on the wheel. The rim now rests on the bat, the base faces up.
- Center the piece. Turn the wheel slowly and watch the foot. Tap the high side gently with your finger to nudge it toward true center. Use a needle tool held against the spinning piece as a visual guide. For a detailed breakdown of this exact step, we like the explanation in this guide to centering and trimming bowls on the pottery wheel.
- Secure the piece. Press three small coils of soft clay against the rim, equally spaced, to hold the piece in place. Do not rely on suction alone, especially with smaller pots.
- Start the wheel at medium speed. Too slow and the tool grabs. Too fast and you lose feel. Find a speed where the surface blurs gently.
- Remove the bulk first. With a loop tool, take long shaving passes across the base to thin it. Aim for a base thickness roughly matching the wall thickness, usually 4 to 6 mm.
- Define the foot ring. Mark the outer and inner diameters of the foot with a needle tool. Carve away the clay inside that ring, leaving a raised band that the pot will sit on. The ring should be 3 to 5 mm wide.
- Refine with a ribbon tool. Switch tools and take fine passes to smooth the foot, the outer base curve, and the lower wall transition. Soften any hard edges.
- Inspect and finish. Stop the wheel. Lift the piece carefully and check the foot from all angles. Run a damp finger or chamois over the foot to soften any tool marks. Sign or stamp the base, then set the piece on a drying board.
Trimming Different Shapes
The basic process stays the same, but each form has its quirks. A bowl, a cylinder, and a plate each need a slightly different setup and tool choice.
Bowls
Bowls are the easiest place to start because they sit on their rim naturally and the curved interior gives the trimming tool a clean line to follow. Trim the foot ring deep enough that the bowl reads as light when you lift it. We suggest carving a slight bevel on the outer edge of the foot so the bowl reads delicately even if the walls are sturdy.
Cylinders and Mugs
Cylinders are trickier because the straight wall has no obvious stopping point. Use light tape or a marked rib to indicate where the trimming should end. Most mugs look best with a small under-cut where the lower wall meets the foot, giving the form a lift. Handle attachment can happen before or after trimming; many potters trim first, then pull handles when the piece is slightly softer.
Plates
Plates need the most planning. Their wide flat bottoms warp easily if the foot ring is too narrow or off-center. Use a wider foot ring, often 60 to 70 percent of the plate’s diameter, to support the weight evenly. A second inner ring can help large plates resist warping during firing. Plates also need to be trimmed slightly damper than smaller forms because the flat base dries faster and risks cracking.
Common Trimming Problems and How to Fix Them
Even experienced potters run into trimming issues. The three problems below cover most of what students bring to us for troubleshooting.
Chattering Marks
Chatter shows up as a series of small evenly-spaced ridges or chips on the trimmed surface, like a vinyl record texture. The cause is almost always a tool that vibrates against clay that is too dry. Some potters use chatter intentionally as a decorative effect, but unintentional chatter ruins a smooth foot.
The fix: re-moisten the surface with a damp sponge and wait a few minutes for the moisture to soak in. Sharpen your tool or switch to a heavier tool that resists vibration. Slow the wheel slightly and hold the tool with a firmer grip, bracing your elbow against your hip for stability.
Uneven Foot Ring
An uneven foot ring means the pot was off-center when you started trimming. The high side gets cut more than the low side, leaving a foot that wobbles on the table. You will see one wall of the foot ring thinner than the other.
The fix: stop, lift the piece off, and re-center it. A piece that is more than 2 mm off-center cannot be saved by trimming heavier on one side, because you will cut through the wall before you fix the foot. Tap the piece back into center using your finger held against the spinning foot, then re-secure with coils of clay.
Breaking Through the Base
The dreaded moment: your tool punches through the bottom of the pot, leaving a hole or a paper-thin spot. This happens when you trim too deeply, or when the base was thinner than you assumed.
The fix depends on severity. A small hole in a leather-hard piece can sometimes be patched with a slip-attached clay disc on the inside, but the patch may crack in firing. The honest answer is that a breakthrough usually means the piece becomes a teaching example. Going forward, before trimming, use a needle tool to pierce the base from the inside and measure the wall thickness against the depth of insertion. We suggest leaving 5 to 6 mm of base on most pots; you can always trim more, but you cannot trim less.
Frequently Asked Questions
Do I have to trim every pot?
No. Some forms, like loose hand-built planters or thin-walled cups thrown with very little base clay, do not need trimming. But most wheel-thrown pieces benefit from some trimming, even if it is just a quick foot ring. A trimmed pot fires more evenly and feels more finished in the hand.
What if my pot dries out before I can trim it?
If the piece is bone-dry, you have two options. You can rewet it by wrapping it in damp towels and plastic for 12 to 24 hours, checking until it returns to leather-hard. Or you can trim it as is, accepting a rougher surface and using sandpaper after bisque firing to smooth the foot. Rewetting works best on stoneware; porcelain often cracks during the moisture swing.
Can I trim without a wheel?
Yes, with a banding wheel and hand tools. Hand-built pieces can be trimmed on any flat surface using a Surform rasp or a serrated rib. The cuts will not have the perfect symmetry of wheel trimming, but for many studio potters this is part of the charm.
How thick should the base be after trimming?
For cups and small bowls, aim for 4 to 6 mm at the thickest point. Plates and large bowls can stay slightly thicker, 6 to 8 mm, to support the wider form. The base should generally match the thickest part of the wall, not be heavier.
Why does my clay tear instead of cutting cleanly?
Tearing means the clay is still too wet. Wait an hour and check again. If you cannot wait, take very light passes with a sharp tool and avoid aggressive angles. A dull loop tool also tears, so check your edge by running a fingernail across it; sharp tools catch slightly on your nail.
Should I trim before or after attaching handles?
We suggest trimming first. The piece is easier to invert and center without a handle sticking out, and the foot ring is your reference for handle placement. Attach handles when the trimmed body and the freshly pulled handle are both at the same leather-hard stage so they shrink together in drying.
Can I trim porcelain the same way as stoneware?
The technique is the same but porcelain has a narrower leather-hard window. It goes from too wet to too dry quickly, and it shows every tool mark. Use sharper tools, lighter pressure, and slightly higher wheel speed. Many porcelain potters trim with ribbon tools rather than loop tools for a cleaner finish.
How do I sign the bottom of my pot?
After trimming, while the foot is still leather-hard, press a stamp or write your initials inside the foot ring with a needle tool or pencil. Keep the marking shallow so it does not weaken the base. A stamp gives consistent branding across many pieces; a hand-signed mark gives each pot a unique touch.