
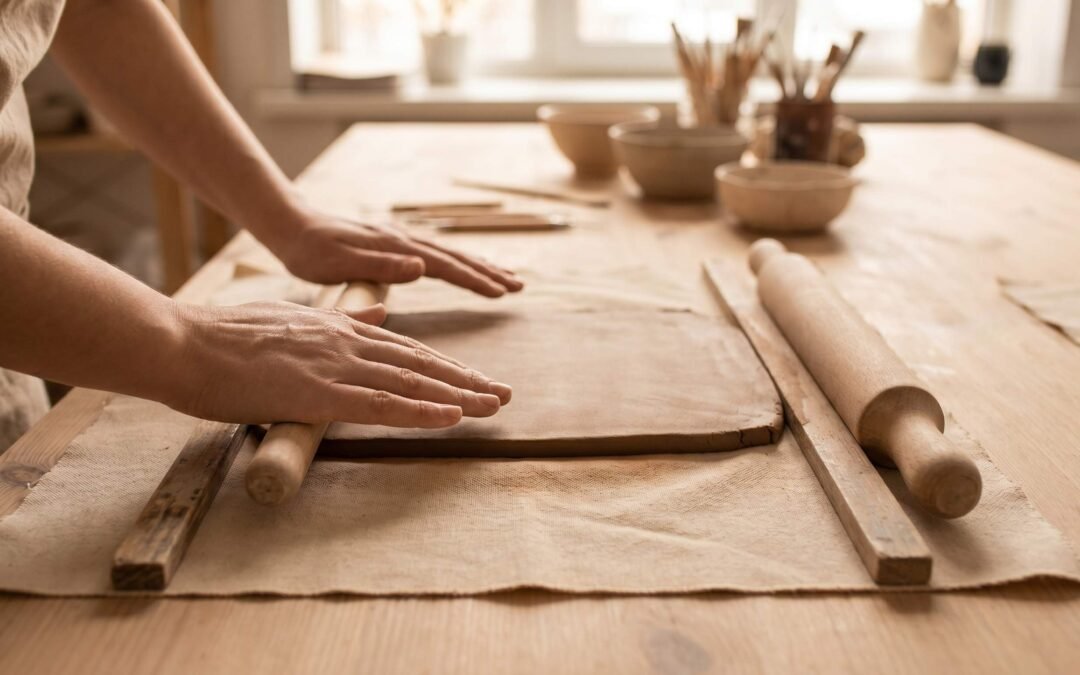
Slab pottery is a hand-building technique where flat sheets of clay, called slabs, are rolled out, cut to shape, and joined together to form vessels, tiles, and sculptural pieces. Unlike wheel throwing, it requires no spinning wheel, just rolled clay, a knife, and the score-and-slip joining method.
What is Slab Pottery?
Slab pottery is the practice of building ceramic objects from flat sheets of clay. You roll the clay into even slabs, cut them with templates or freehand, and join the pieces into the final form. The technique sits inside the broader family of hand-building techniques, one of the three classic approaches alongside coil and pinch methods.
Here is how slab building differs from its cousins. Wheel throwing spins a centered lump of clay and pulls walls upward with hand pressure, producing rounded, symmetrical forms. Pinch pottery starts with a ball of clay and opens it by squeezing the walls between thumb and fingers, a method that works well for small intimate vessels. Coil pottery stacks ropes of clay one on top of the other, then smooths the joins, which suits taller curved forms like vases.
Slab work plays by different rules. Because you start with a flat plane, geometry comes naturally. Boxes, square plates, tiles, mugs with straight walls, lampshades, planters with crisp corners, even sculptural panels all begin life as a flat slab. The technique rewards builders who think architecturally rather than radially. If you have ever built something with cardboard and tape, you already understand the basic logic of slab construction.
Slab pottery also scales well. A pinch pot is limited by the size of your hand. A coil pot is limited by your patience. A slab piece is limited only by how big a slab you can roll, which means slab work suits ambitious projects like large platters, garden planters, and architectural tiles.
The Two Slab Methods: Soft vs. Hard
This is the single most important distinction in slab pottery, and the one most beginner guides skip past. Almost every slab project falls into one of two camps, and choosing the right method up front saves hours of frustration later.
Soft slab work uses clay fresh off the rolling pin, still wet and pliable. The slab drapes like heavy fabric, which means you can curve it around a form, slump it into a mold, or twist it into organic shapes. Hard slab work waits. You roll the slab, then let it stiffen for 30 to 60 minutes until it reaches a leather-hard state, firm enough to hold a sharp edge but still moist enough to bond with other pieces. The hard slab is the carpentry approach: cut, square, join, and the corners stay crisp.
| Method | Clay State | Best For | Key Challenge |
|---|---|---|---|
| Soft slab | Freshly rolled, pliable | Draped forms, organic shapes, slump molds | Slumps under its own weight if unsupported |
| Hard (leather-hard) slab | Stiffened 30 to 60 min, holds shape | Boxes, tiles, geometric forms, mugs | Joins must be made while still pliable enough to score |
We suggest beginners start with hard slab projects. The leather-hard state forgives slow work. You can step away, sketch your template, cut your pieces, and assemble them without racing against the clock. Soft slab calls for confidence and speed because the clay starts drying the moment it leaves the canvas, and a soft slab left unsupported will sag, fold, and lose any shape you tried to give it.
The two methods are not mutually exclusive. Some projects use both. A slab mug might use hard slab walls for crisp geometry, with a soft slab handle attached while it can still curve gracefully. Learning to read the clay state and switch methods inside a single project is one of the markers of a confident slab builder.
Tools You Need
Slab pottery has one of the shortest tool lists in ceramics. You can start with a kitchen drawer and a few hardware-store extras.
- Rolling pin or slab roller. A wooden rolling pin works for plates and small panels. A tabletop slab roller is faster and produces more even thickness, but it is not required to start.
- Canvas or heavy cloth work surface. Canvas keeps clay from sticking to the table and leaves a subtle texture on the slab. A cotton sheet stretched tight over a board works too.
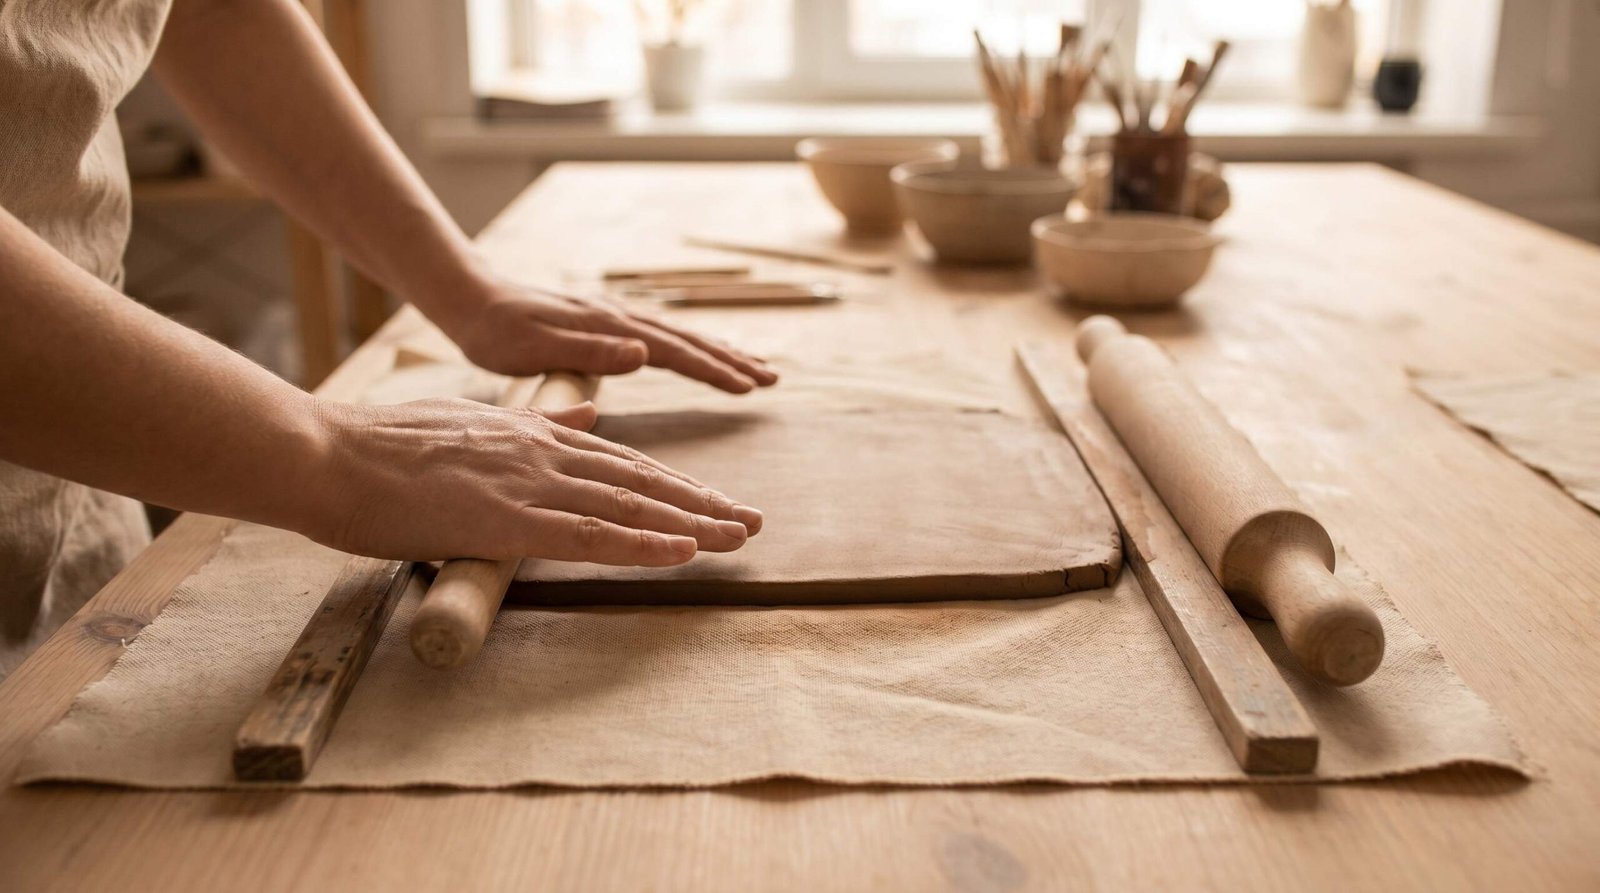
- Two guide sticks of equal height. These are the secret to even slabs. Place a stick on each side of the clay, then roll the pin across both sticks. The pin rides on the sticks and produces a slab the exact thickness of the sticks.
- Clay knife or wire tool. A fettling knife or an old paring knife for cutting templates and trimming edges.
- Needle tool. Used for scoring slab edges before joining. A fork from the silverware drawer makes a respectable substitute.
- Sponge. A small natural sponge for smoothing edges and adding moisture where needed.
- Rubber kidney. A flexible rib for compressing surfaces and smoothing joins. Once you use one, you will not work without it again.
For the complete full beginner toolkit, including bats, ribs, and trimming tools, see our toolkit guide. Slab work in particular rewards a small investment in two solid guide sticks. Quarter-inch hardwood lath from any hardware store, cut to 18 inches, will outlast most beginners.
Clay Selection
Not every clay body suits slab building. The clay you choose will decide whether your slabs warp, crack, or hold their shape.
Grogged stoneware is the right answer for almost every beginner slab project. Grog is essentially pre-fired ground clay, mixed back into the wet clay body. Those small refractory particles do two important things. They reduce shrinkage during drying, which means slabs stay flatter. They also create internal structure, so the slab resists warping under its own weight. A stoneware body with 10 to 20 percent fine grog is the sweet spot for plates, tiles, and box construction.
Smooth porcelain looks tempting because of its bright white finish, but it warps more easily, shrinks more aggressively, and punishes any uneven drying. Beginners who start with porcelain slabs usually quit slab work after their first failed batch. Save porcelain for later, once you have the score-and-slip rhythm down.
Earthenware works for small slab tiles and decorative pieces, but its lower fired strength makes it a poor choice for functional ware like plates and mugs. For specific product picks across all three categories, see our guide to the best clay for beginners.
Step-by-Step: How to Roll a Slab
Rolling a slab is the foundation of everything that follows. A bad slab cannot be saved, no matter how carefully you cut and join it.
- Wedge your clay first. Wedging removes air bubbles and orients the clay particles so the slab rolls evenly. Skipping this step almost guarantees a slab that tears or warps. Our guide on how to wedge clay covers the spiral and ram’s head methods in detail.
- Shape the clay into a thick patty. Press the wedged clay into a rough rectangle slightly thicker than your guide sticks. Aim for the clay to be about twice the thickness of the final slab.
- Place guide sticks on each side. Quarter-inch sticks produce a quarter-inch slab, which is the standard thickness for most functional work. Lay the sticks parallel to the rolling direction, one on each side of the clay patty.
- Roll from the center outward. Start in the middle and roll toward one edge, then return to the center and roll toward the other edge. This pushes air out and keeps the slab from getting longer at one end.
- Rotate the canvas, not the clay. When you need to change direction, lift and turn the canvas 90 degrees. The clay stays put. Picking up the slab itself stretches and distorts it, which shows up later as warping.
- Stop when the rolling pin rides on the guide sticks. Once the pin makes contact with both sticks along its full length, the slab is at target thickness. Any more rolling just packs the clay unevenly.
- Smooth the surface with a rubber kidney. A light pass with a kidney closes any small cracks on the surface and compresses the clay particles, which strengthens the slab and reduces warping risk.
A finished slab should look matte and feel firm but moist. If you see canvas texture pressed deep into the surface, the clay was too soft. If the slab cracks at the edges as you roll, the clay was too dry or insufficiently wedged.
Step-by-Step: How to Cut and Join Slabs (Score and Slip)
Joining slabs is where most beginner pieces fail. Two slabs pressed together without proper joining will pop apart in the kiln, often hours into the firing, and you will have no way to save them. The score-and-slip method exists because of how clay behaves at the microscopic level.
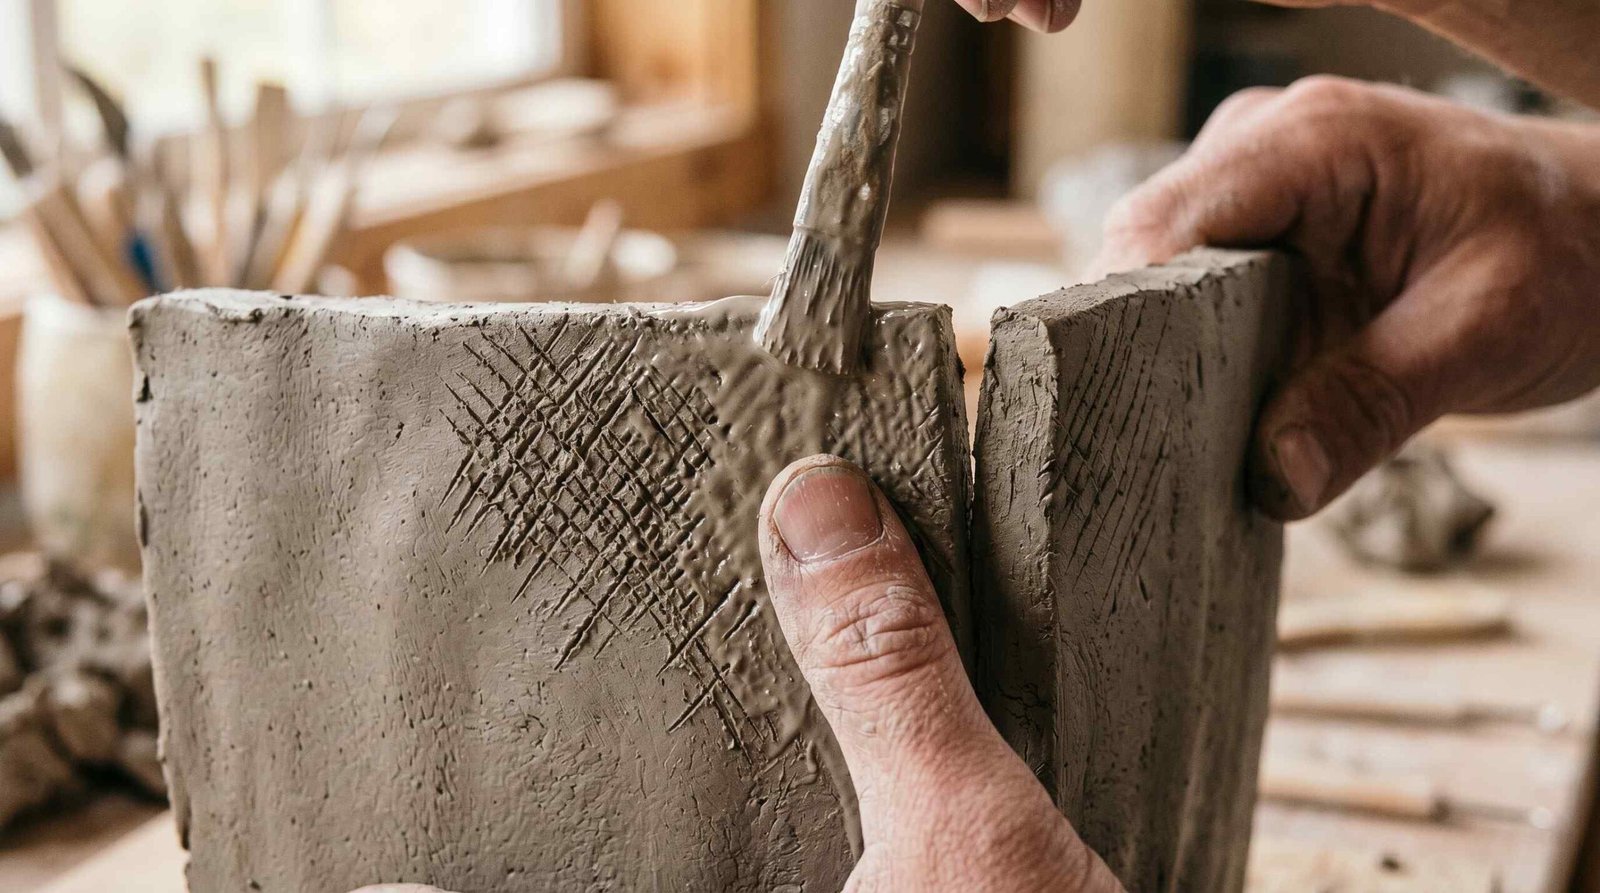
Clay is crystalline. Each particle is a tiny flat plate, and a smooth slab surface presents a slick face that cannot bond to another slick face. Scoring breaks that smooth surface, exposing fresh edges and rough particles. Slip, which is liquid clay, then fills those scratches and acts as a bridge. When the two pieces are pressed together, the slip carries clay particles from both sides into the fresh scratches, and the join fuses at the particle level. Skip the scoring, and you are basically gluing wet paper to wet paper with water.
Here is the join sequence.
- Cut your slab pieces. Use a sharp knife and a template if needed. Cut straight down through the slab, not at an angle, unless the design calls for mitered corners.
- Let the slabs firm to soft leather-hard. The slab should hold its shape when picked up but still feel cool and moist. This typically takes 20 to 45 minutes depending on the weather.
- Score both surfaces aggressively. Use a needle tool, fork, or serrated rib. Cross-hatch the join area with deep scratches, about an eighth of an inch deep. Both surfaces that will meet must be scored. Half-scoring is worse than no scoring.
- Apply slip generously. Slip is just clay mixed with water to a yogurt-like consistency. Many potters keep a small jar of slip made from the same clay body they are using. Brush a thick layer onto both scored surfaces.
- Press firmly and hold. Push the pieces together with steady pressure. You should see slip squeeze out at the seam. That oozing slip is a good sign, it means full contact.
- Blend the joint on the inside. Use a wooden modeling tool or your thumb to smear clay from one slab across to the other, reinforcing the join from the inside. The outside seam can be left visible or smoothed flat depending on your design preference.
- Add a coil to the inside seam. For boxes and mugs, press a small clay coil into the inside corner and blend it in. This adds structural strength and dramatically reduces the chance of seam cracking in the kiln.
The Ceramic Arts Network’s guide to soft slab pottery techniques recommends supporting draped forms with newspaper until leather-hard, which prevents the soft slab from collapsing while the join sets.
Drying Slab Pottery: The Warping Problem
If you only remember one section of this guide, make it this one. More slab pottery is ruined during drying than during any other stage, and the cause is almost always the same: uneven moisture loss.
Here is what happens. The top of a slab plate, exposed to air, loses water faster than the bottom, which sits on a board or table. As the top shrinks, it pulls the edges upward. The plate cups. By the time you notice, the warp is permanent, baked in by the differential shrinkage of two sides drying at different rates.
The fix is straightforward in concept, harder in practice. Make the two sides dry at the same rate. Several techniques get you there.
- Cover with plastic for 24 to 48 hours. A loose drape of dry-cleaner plastic slows the surface drying so the bottom of the piece can keep pace.
- Flip the piece on a bat. Once the top has firmed slightly, place a wooden bat on top and flip the slab. Now the original bottom is exposed and the original top is covered. Repeat once or twice during the first day.
- Keep wall thickness even. A slab that is half-inch thick in some spots and quarter-inch in others will warp no matter how carefully you dry it. Thicker spots hold moisture longer and shrink later, pulling the thinner areas out of plane.
- Dry on a porous surface. Plaster bats, drywall scraps, or unfinished wood let moisture wick out of the underside, balancing the drying from both faces.
- Avoid drafts and direct sun. A breeze across one side of a slab is a guaranteed warp. Move the piece somewhere still until it is fully bone-dry.
For deeper reading, see the warping prevention guidance from Ceramic Arts Network, which catalogs the most common causes of cracking and warping in flat ware.
5 Beginner Slab Pottery Projects
The fastest way to learn slab building is to make five slab projects in a row. Each one teaches a different skill, and by the fifth piece, the score-and-slip rhythm becomes automatic.
- Slab tile with texture imprint. Roll a quarter-inch slab, cut a four-inch square, then press lace, leaves, burlap, or stamps into the surface. This single project teaches you to roll evenly, cut accurately, and dry flat. It also produces a finished piece you can hang on the wall.
- Simple pinch-free bowl using a slump mold. Cut a circular slab, drape it over an inverted bowl lined with plastic wrap or newspaper, and let it firm overnight. Trim the edges, smooth them with a sponge, and you have a curved bowl made entirely with soft slab technique. No pinching, no coiling.
- Slab mug. Cut a rectangle for the wall, a circle for the bottom, and a strip for the handle. Wrap the rectangle into a cylinder, score-and-slip the side seam, attach the base, then add the handle. This is the project that proves you can make functional ware with nothing but flat clay.
- Small lidded box. Six rectangles for a base, four walls, and a lid. The hard-slab approach shines here because crisp 90-degree corners are the whole point. A lidded box also teaches you to plan for shrinkage, since the lid must fit the opening after both pieces have shrunk in firing.
- Textured wall tile or name plaque. A larger flat slab with carved or stamped lettering, fired in a pottery kiln and glazed, makes a finished gift piece. If you do not yet own a kiln, see our guide on how to how to fire pottery for pit-fire and raku-style alternatives.
Troubleshooting Slab Pottery Problems
Almost every slab problem traces back to one of five root causes. This table is the one to bookmark.
| Problem | Cause | Fix |
|---|---|---|
| Slabs warp in drying | Uneven drying, one side exposed | Dry under plastic, flip on a bat |
| Joins crack at seams | Score-and-slip skipped or clay too dry | Score more aggressively, use thick slip, join within 30 min of rolling |
| Slab collapses when assembling | Clay too soft (wet) | Let slab firm to soft leather-hard before joining |
| Surface cracks appear | Clay dried too fast | Slow the drying, mist with water and cover |
| Uneven slab thickness | No guide sticks used | Always use guide sticks of equal height on both sides |
| S-cracks on tile bottoms | Clay particles not compressed enough | Pass a rubber kidney across both faces of the slab after rolling |
One pattern repeats across this table. Almost every failure stems from rushing the clay, either by joining too fast, drying too fast, or rolling without preparation. Slab pottery rewards patience more than skill, and the builders who slow down win.
Glazing Slab Work
Slab surfaces are a glazer’s dream. The flat planes of a slab piece hold brushwork better than the curved walls of a wheel-thrown vessel, where gravity drags the glaze downward and pools at the base. Underglaze designs, wax-resist patterns, and layered glaze applications all sit cleanly on a slab.
Some slab decoration happens before assembly. You can paint underglaze patterns onto a leather-hard slab while it is still flat on the canvas, then assemble the piece once the underglaze has dried. This trick lets you apply intricate designs without trying to reach into corners or down inside narrow forms. AMACO’s slab plate tutorial shows how to apply underglazes to a leather-hard slab before assembly, using reusable stencils for repeatable patterns.
For the full process of bisque firing, glaze application, and glaze firing, see our complete guide to pottery glazing for beginners.
Frequently Asked Questions
What is the difference between slab pottery and coil pottery?
Slab pottery builds with flat sheets of clay cut to shape and joined at the edges, which suits geometric forms like boxes, tiles, and mugs with straight walls. Coil pottery stacks ropes of clay one on top of the other and blends the seams together, which suits taller curved forms like vases and large urns. Both are hand-building methods, but the resulting shapes look fundamentally different. Slab pieces tend toward architecture, coil pieces tend toward organic curves.
Can you make a mug with slab pottery?
Yes, and the slab mug is one of the best beginner slab projects. Cut a rectangle for the wall, score-and-slip the short ends together to form a cylinder, attach a circular base, and add a slab or coil handle. Slab mugs have a distinctive faceted or square look that wheel-thrown mugs cannot produce, which is exactly why many potters choose the slab method for this form.
Does slab pottery need to be fired in a kiln?
Slab pottery follows the same firing rules as any other clay work. To become permanent and waterproof, it needs to be fired to vitrification temperature, which means a kiln for most clay bodies. Stoneware and porcelain require temperatures above 2,200 degrees Fahrenheit, which only an electric or gas kiln can reach safely. Earthenware slabs can be fired at lower temperatures, and some pit-fire and raku methods can produce decorative slab pieces without a conventional kiln, though the results are not food-safe.
What thickness should slab pottery be?
Quarter-inch thickness (about 6 millimeters) is the standard for most functional slab pottery, including plates, mugs, and bowls. Tiles can go slightly thinner at three-sixteenths of an inch. Large sculptural pieces and outdoor planters benefit from three-eighths or even half-inch thickness for strength. The most important rule is consistency. Wherever you choose, keep the entire slab at exactly that thickness using guide sticks.
What clay is best for slab building?
Grogged stoneware is the best all-around choice for slab work. The grog particles reduce shrinkage, resist warping, and forgive small errors in drying technique. A mid-fire stoneware with 10 to 20 percent fine grog handles plates, boxes, and mugs reliably. Beginners should avoid pure porcelain for slab projects because it shrinks aggressively and warps under uneven drying.
How do you stop slab pottery from warping?
Warping comes from uneven drying, so the fix is to equalize the rate of moisture loss across the whole piece. Cover the work loosely with plastic for the first 24 to 48 hours, flip the piece on a bat once the top has firmed, keep the wall thickness even throughout, and dry on a porous surface like plaster or unfinished wood. Avoid drafts and direct sunlight. Slab pottery dried slowly almost never warps, while slab pottery rushed through drying almost always does.