
Pinch Pot: What It Is, How to Make One, and What to Do Next
The pinch pot is the oldest pottery form humans have ever made, and it is still the fastest way to put your hands on clay and produce something real. Shaped by pressing a thumb into a ball of clay and pinching the walls outward, it requires no wheel and almost no tools. Beginners learn clay sensitivity through it. Experienced potters return to it for sculpture.
What Is a Pinch Pot?
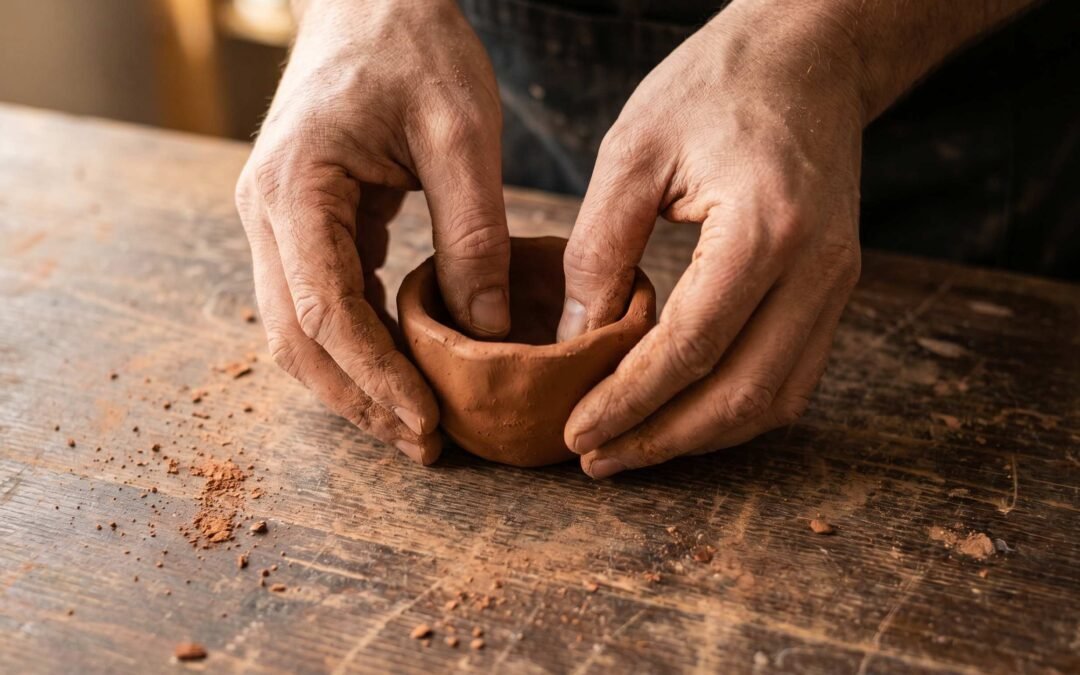
A pinch pot is a small vessel shaped entirely by hand, formed by pressing the thumb into a ball of clay and gently pinching the walls outward as the piece rotates in the palm. The technique uses no wheel and no slab, only fingertip pressure and rotation. The result can be a bowl, a cup, a candle holder, or the starting point for a much larger sculptural form.
This method is foundational for one practical reason: it teaches you what clay actually feels like. You learn how soft is too soft, how dry is too dry, how thick a wall needs to be before it cracks, and how to centre a form without a spinning wheel doing the work for you. Wall thickness becomes intuitive. Pressure becomes calibrated. Every potter who later moves to the wheel benefits from those reflexes built in the palm of the hand.
The historical depth is genuinely striking. Pinch-formed pottery sherds from the Odai Yamamoto site in northern Japan have been dated to roughly 16,500 years ago, placing them firmly in the Jomon period and making them among the oldest ceramic vessels ever recovered. World History Encyclopedia’s overview of pottery in antiquity traces how hand-formed vessels predate the potter’s wheel by thousands of years across multiple continents. From Neolithic Europe to ancient China to the Americas, hand-pinched vessels appear in nearly every early ceramic tradition we have unearthed.
That same exercise is now the first thing taught in nearly every ceramics studio in the world. Elementary schools start there. University programs return to it for sculptural studies. Production potters use the form as a warm-up. It works because it cannot be faked.
Choosing the Right Clay
Clay choice matters more for pinch pots than people expect, because your hands are the only tool standing between success and a cracked rim. Three main clay bodies are worth knowing, and each has a clear personality.
Earthenware is the most forgiving option for beginners. It is soft, plastic, and fires at lower temperatures (Cone 06 to Cone 04, around 1,830°F to 1,940°F). It stays workable longer in the hand, which gives you more time to pinch. Most school studios use earthenware for this reason. The trade-off is porosity: earthenware remains slightly porous after firing unless properly glazed.
Stoneware is stronger, denser, and food-safe once fired and glazed properly. It fires at Cone 5 to Cone 10 (roughly 2,165°F to 2,381°F) and produces a durable, water-tight body. It is slightly less plastic than earthenware, but the difference is small. For a first pinch pot you intend to use, stoneware is our suggestion.
Porcelain looks gorgeous when fired and translucent at thin sections, but it is unforgiving for hand-building. It dries fast, cracks easily, and demands precise wall consistency. We suggest leaving porcelain for later, after you have made a dozen successful stoneware or earthenware pinch pots.
One factor unifies good hand-building clays: grog. Grog is fired, crushed clay particles re-blended into the wet clay body, acting as internal scaffolding inside the wall. It reduces shrinkage stress as the piece dries, cuts crack risk, and gives the surface a slightly toothy texture that helps fingertips grip the wall. Most clays labelled “sculpture clay” or “grogged stoneware” are formulated for this kind of work.
For beginners who want to skip kiln firing entirely, air-dry clay is a legitimate starting point. It hardens at room temperature over 24 to 72 hours and requires no equipment. The trade-offs are real: air-dry clay is not waterproof, not food-safe, and far less durable than fired ceramic. Treat air-dry pots as decorative practice. For bag-by-bag differences, our guide to choosing your first clay body covers brands and price ranges.
Tools You’ll Need (and a Few That Help)
You need almost nothing. A pinch pot is the only pottery technique where you can produce a finished form with bare hands on a kitchen table. That said, a small kit makes the work easier.
Truly essential: a smooth, non-porous work surface (a sealed wooden board, a sheet of canvas-covered plywood, or even a clean countertop); a small cup of water for moistening your fingers; and a natural sponge for smoothing.
Nice to have, not required: a pin tool for releasing trapped air bubbles and trimming uneven rims; a rubber rib for smoothing walls and compressing surfaces; a banding wheel (a small turntable you rotate by hand) for working all sides without picking the piece up; a wire cutter or clay knife for cleanly separating clay from the block.
That is the whole list. We suggest resisting the temptation to buy a kit before your first pot, since half the items in any beginner kit are for slab and wheel work. Our full pottery tools guide covers what each tool actually does.
How to Make a Pinch Pot, Step by Step
Quick reference: Wedge a fist-sized ball of clay, press your thumb two-thirds of the way into the centre, then pinch and rotate the walls outward to an even 6-8mm thickness. Smooth the rim, firm up the base, and let the piece rest before refining.
Now the longer version, with the small decisions that separate a wobbly first attempt from a clean, confident pot.
1. Wedge the clay
Wedging is kneading for clay. It removes air pockets that will explode in the kiln and organises the clay particles for consistent plasticity. Press the clay forward with the heel of your palm, fold it back, rotate a quarter turn, and repeat for two to three minutes. Even with fresh clay from the bag, give it 30 seconds of wedging. Trapped air is the most common cause of kiln failure.
2. Form a ball
Roll the wedged clay into a smooth sphere between your palms. For a first pinch pot, aim for somewhere between a golf ball and a tennis ball, roughly 150 to 250 grams. Smaller balls are easier to control; larger balls let you build taller walls. The surface should be smooth, with no visible cracks.
3. Push your thumb in
Cradle the ball in your non-dominant palm. Press your dominant thumb slowly and straight down into the centre of the ball, going roughly two-thirds of the way down but not all the way through. You should be able to feel the floor of the pot through the clay against your supporting palm. The opening you create is the inside of your future pot.
4. Pinch and rotate
This is the core of the technique. With your thumb inside the pot and your fingers outside, gently pinch the wall, then rotate a quarter turn. Pinch again. Rotate. Your goal is consistent wall thickness, roughly 6 to 8 millimetres all the way around. Use your pinky finger as a thickness caliper. Press it lightly against the wall every few rotations.
5. Shape the walls upward
Work in passes from base to rim. The first pass thins the base of the wall, the second thins the middle, the third refines the top. Resist pushing the rim outward too fast. Walls grow taller as you thin them, so a gradual pinch produces a taller, more even pot than aggressive squeezing.
6. Check and correct the base
Set the pot down and look at the base. It should sit flat, without rocking. If the bottom is rounded or unstable, gently pat it down on the flat surface. If the base feels too thick from inside, hollow it slightly with your thumb in a circular motion. A base too thin will crack in the kiln; too thick will trap moisture.
7. Refine the rim
The rim is the most visually prominent line on the finished pot. Smooth it with a moist fingertip or damp chamois. You can leave it straight, curve it outward for a flared bowl, or pinch it inward for a closed form. A consistent rim signals craftsmanship; an uneven rim signals a rush.
8. Allow to firm up slightly
Set the pot aside for 5 to 15 minutes before any detail work. This rest lets the clay stiffen just enough to hold shape under pressure, which makes refinement easier. Cover the piece loosely with a plastic bag if your studio is dry.
Common Pinch Pot Problems
Every potter hits the same handful of problems on the first few attempts. The fixes are simple once you know what is going wrong.
| Problem | Likely Cause | How to Fix |
|---|---|---|
| Walls cracking mid-session | Clay drying too fast | Mist walls with water, work faster |
| Rim collapsing inward | Walls too thin at top | Add thin coil, blend in, support from inside |
| Wobbly or uneven base | Base too thin or uneven | Pat on hard flat surface; add thin clay pad |
| Air bubble visible in wall | Air trapped at wedging stage | Pierce with pin tool at an angle, seal with slip |
| Bottom too thick | Didn’t check depth | Thin from inside with thumb in circular motion |
| Walls vary wildly in thickness | Uneven pinch pressure | Use pinky finger as thickness caliper every rotation |
Decorating Your Pinch Pot Before Firing
Decoration is where a pinch pot stops being an exercise and starts being yours. The trick is matching the technique to the clay’s stage of dryness.
Leather-hard stage is the sweet spot for most decorative work. The clay is firm enough to hold a clean cut but soft enough to take detail without crumbling. Carving, sgraffito, and burnishing all work best here. Leather-hard usually arrives 2 to 6 hours after forming.
Texture stamping works while the clay is still soft. Press natural objects directly into the wall: leaves, burlap, lace, shells, seed pods, or wooden stamps. Press firmly enough to leave a clear impression but not so hard that you distort the wall. Texture catches glaze later and produces depth.
Carving and sgraffito let you cut designs into the leather-hard wall. Sgraffito is the technique of brushing a layer of coloured slip over the surface, letting it set, then scratching through to reveal the clay body underneath. The contrast between slip and body produces crisp graphic lines. A simple loop tool or sharpened pencil works for the cutting.
Slip trailing creates raised lines by piping liquid clay through a fine-nozzle bottle onto the surface, similar to icing a cake. The trails dry slightly proud of the surface, catching light and glaze. It is one of the easiest decorative techniques and produces distinctive results.
Oxide washes add earthy, muted tones. Brush a thin solution of metal oxide (iron, copper, manganese) onto the bone-dry pot, then wipe back the high spots with a damp sponge. The oxide settles into recesses, accentuating every carved line after firing.
Drying, Firing, and Glazing
The biggest cause of broken pinch pots is rushed drying. Clay shrinks as water evaporates; uneven evaporation creates uneven shrinkage, which creates cracks. The fix is patience.
The slow drying rule: cover the finished pot loosely with a plastic bag for the first 1 to 2 days, allowing some air exchange but slowing evaporation. After that, uncover and let the piece dry openly for another 2 to 4 days until it reaches bone-dry stage. Bone-dry clay feels room temperature against your cheek; damp clay feels cool. That cheek test is shockingly reliable.
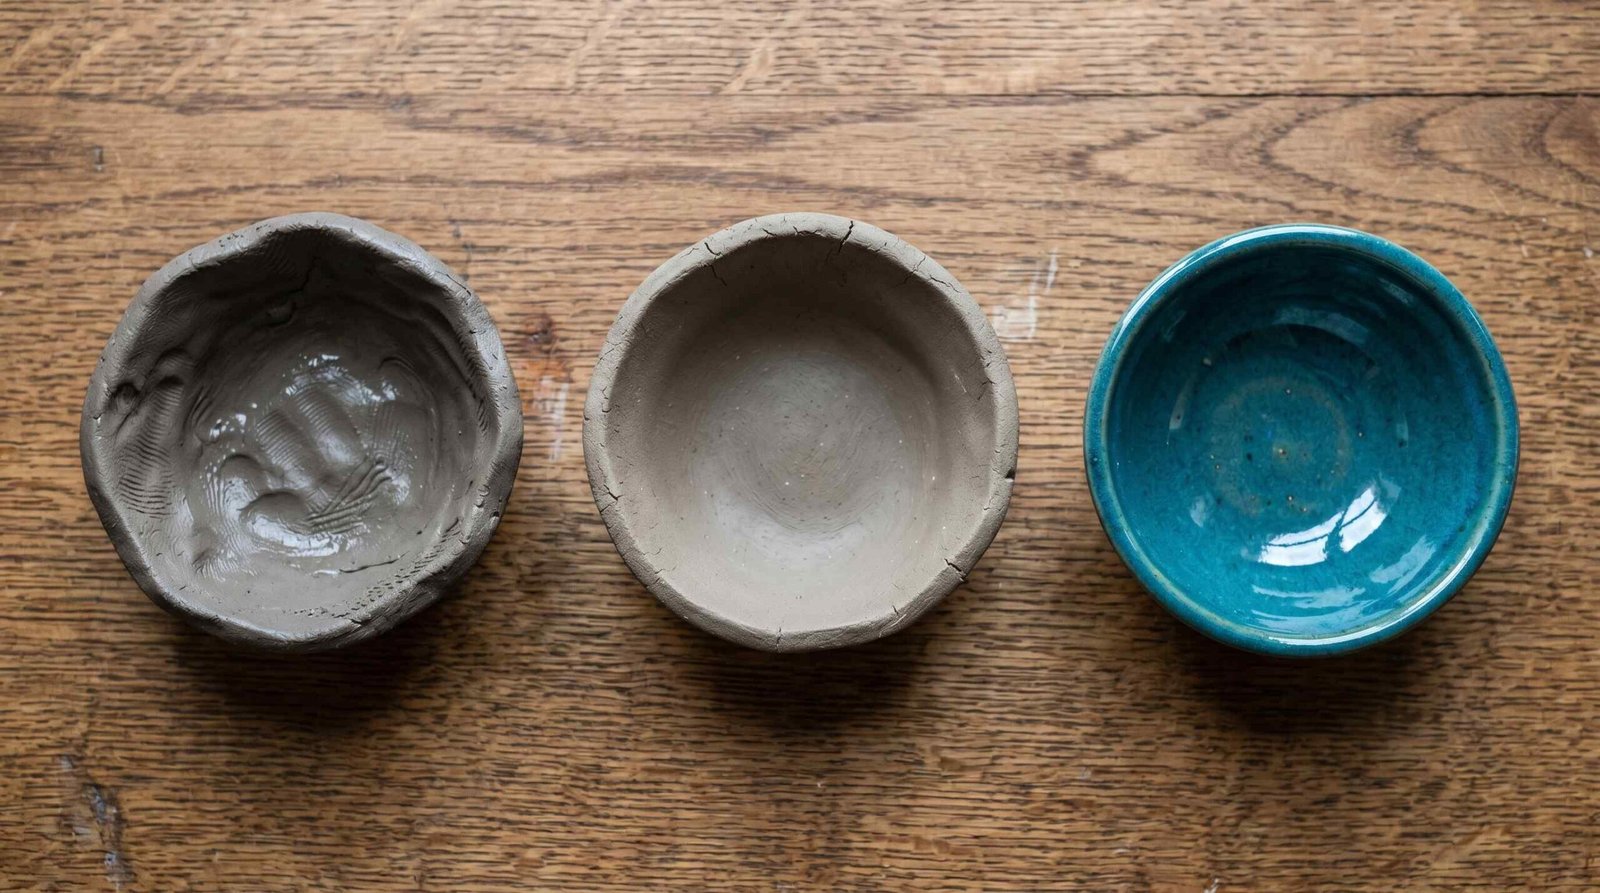
Bisque firing is the first firing, converting fragile bone-dry clay into hard, porous ceramic ready for glaze. For most earthenware, bisque to Cone 04, roughly 1,888°F (1,031°C). For very low-fire work, Cone 06 (~1,830°F / 999°C). Stoneware bodies can also bisque at Cone 06 to 04 before going to a higher glaze firing. The University of Colorado’s guide to pottery production outlines how these temperature ranges have stayed remarkably consistent across millennia of ceramic practice.
Glaze firing temperature depends on the clay body. Earthenware glazes mature at Cone 06 to Cone 04. Stoneware glazes mature at Cone 5 to Cone 6 (around 2,165°F to 2,232°F). Porcelain can go higher, up to Cone 10. Mismatched clay and glaze temperatures produce defects.
Food safety is non-negotiable for any pot you intend to eat or drink from. Use lead-free, food-safe glazes labelled as such by the manufacturer. Not every pottery glaze is food-safe, and some attractive colourants (notably barium and certain copper formulations) can leach into food in acidic conditions. If the label does not explicitly state food-safe, assume the glaze is decorative only. Our walkthrough on pottery glazing for beginners covers application thickness, common defects, and matching glaze to clay body. Windward Community College’s ceramics hand-building resource is also worth a look for how studios categorise tools and technique stages.
If you do not have access to a kiln, you still have options. Raku, pit firing, and barrel firing all produce beautiful results outdoors with combustible materials and basic safety gear. Our guide to how to fire pottery without a kiln walks through three methods with cost estimates and safety notes.
Taking Pinch Pots Further
The pinch pot is not a stopping point. Once you can produce a clean small bowl, the same skill scales into much more ambitious work.
Joining two pinch pots at the rim produces a hollow sphere or closed form. Make two matching pinch pots, let them firm to leather-hard, score the rims, apply slip as glue, press them together, and blend the seam. You now have a sealed hollow form that can become a vase, a rattle, or a sculptural base. Many large ceramic sculptures begin as joined pinch pots.
Pinch pot animals are a classic studio project. A joined hollow form becomes a body, extruded coils become legs, smaller pinch pots become heads, and pinched scraps become ears, tails, and fins. Children’s classes adore this. Adult sculptors use the same principles for serious work.
Pinch and coil combined is the move that unlocks taller forms. Start with a pinch pot as the base, then build the walls upward by stacking coils of clay. The pinch pot gives you a clean, structurally sound bottom; the coils give you height without the wall-thinning problems of trying to stretch a single ball of clay too far. Our walkthrough on coil pottery technique covers coil joining in detail, and the broader overview of hand-building techniques places pinch, coil, and slab work in context.
Hand-Building Techniques Compared
Pinch is one of three foundational hand-building approaches. Here is how they stack up at a glance.
| Technique | Skill Level | Best For | Time to Learn Basics | Equipment Needed |
|---|---|---|---|---|
| Pinch pot | Beginner | Small bowls, cups, sculptural forms | 1-2 sessions | Just your hands |
| Coil building | Beginner-Intermediate | Tall vessels, organic shapes | 2-4 sessions | Banding wheel helpful |
| Slab building | Intermediate | Flat-sided forms, tiles, mugs | 2-3 sessions | Rolling pin, canvas |
None of the three is strictly harder, but they reward different sensibilities. Pinch suits organic, rounded forms. Coil suits tall, sculptural pieces with visible rhythm. Slab suits architectural, hard-edged designs. Most experienced potters use all three, sometimes in the same piece.
Pinch Pot FAQ
What is a pinch pot made of?
A pinch pot is made of clay, most commonly earthenware, stoneware, or porcelain, with grogged stoneware being our suggestion for beginners. Air-dry clay is a viable alternative if you do not have kiln access, though the finished piece will not be food-safe or waterproof. The only requirement is that the clay be plastic enough to pinch without crumbling.
How long does it take to make a pinch pot?
The forming itself takes 20 to 45 minutes for a small bowl, depending on how much refinement you want. Drying takes 3 to 6 days. Bisque firing takes about 8 to 12 hours including kiln cool-down. Glazing and glaze firing adds another full day. From wet clay to finished pot, expect roughly one to two weeks total elapsed time.
What is the best clay for a pinch pot?
Grogged stoneware is our suggestion for most first-time potters. It is plastic enough to pinch easily, durable enough for daily use after firing, and the grog reduces crack risk during drying. If you do not have kiln access, air-dry clay works for decorative practice. Avoid porcelain until you have several successful pots behind you.
How thick should pinch pot walls be?
Aim for 6 to 8 millimetres of consistent thickness throughout the wall. Walls thinner than 4mm tend to crack during drying or warp in the kiln. Walls thicker than 10mm dry unevenly, trap moisture, and can explode during bisque firing. Use your pinky finger as a rough caliper as you work.
Can you make a pinch pot with air-dry clay?
Yes, and it is a popular entry point for anyone without studio access. Air-dry clay pinches and shapes the same way as kiln clay, but it hardens at room temperature over 24 to 72 hours. The finished piece will not be waterproof or food-safe, so treat it as a decorative object rather than functional ware. Sealing with acrylic varnish extends its lifespan.
Can you put a pinch pot in the oven or microwave?
Properly bisqued and glazed stoneware pinch pots, finished with a food-safe glaze, can generally handle both, though sudden temperature changes risk thermal shock and cracking. Earthenware is less heat-tolerant and may craze. Air-dry clay should never go in an oven or microwave, as it will break down. Always check the specific clay and glaze manufacturer guidance.
Why do pinch pots crack, and how do I stop it?
Pinch pots crack for three main reasons: walls of uneven thickness drying at uneven rates, drying too fast in open air, and air pockets trapped during wedging that expand during firing. The fixes are wedging thoroughly, maintaining 6-8mm even walls, and covering pots loosely with plastic for the first 24 to 48 hours of drying.
What can you make with a pinch pot?
Beyond small bowls and cups, pinch pots are the foundation for candle holders, planters, ring dishes, incense burners, hollow sculptural forms (by joining two pots at the rim), pinch pot animals, vases (with added coils), and decorative wall pieces. Many large studio sculptures begin as joined pinch pots. The technique scales remarkably well once you trust your hands.