
Can you fire pottery without a kiln? Yes, using open fire, pit firing, raku, or a microwave kiln. The honest caveat: none of these methods reach the temperatures needed for food-safe glazed stoneware. They work well for decorative earthenware, sculptural pieces, and air-dry clay. Here is how each method works and what it actually produces.
The temperature reality: what “firing” actually requires
Before you light anything, understand what firing actually does. Clay becomes ceramic when silica particles fuse together at specific temperatures. Hit that temperature, and you get a durable, vitrified piece. Fall short, and you get something that looks like pottery but behaves like a sponge.
Different clay bodies mature at very different temperatures:
- Earthenware: 900-1100°C (1650-2010°F)
- Stoneware: 1200-1300°C (2200-2370°F)
- Porcelain: 1260-1400°C (2300-2550°F)
A well-built campfire or pit fire tops out somewhere between 700 and 1000°C with careful management. That is enough to harden earthenware, but nowhere near the stoneware range. This single fact governs everything else in this article.
Here is what it means in practice. Earthenware fired in a backyard pit is porous. It will absorb water, beverages, and oils. Without a proper food-safe glaze fired in a kiln at the right cone, it cannot safely hold food. It will also be more fragile than the mugs you buy at the store. If you bought a bag of Laguna B-Mix or any modern stoneware clay and you plan to pit-fire it, you will be disappointed: those clays are formulated for cone 6-10 kiln firing, and they will come out underfired, chalky, and weak.
One exception sidesteps the whole temperature problem: air-dry clay. It needs no firing at all. More on that further down.
| Clay type | Required temp | Campfire / pit? | Microwave kiln? | Best use |
|---|---|---|---|---|
| Earthenware (low-fire) | 900-1100°C | Yes, with care | Yes, small pieces | Decorative ware |
| Stoneware | 1200-1300°C | No (underfires) | No | Functional ware (needs kiln) |
| Porcelain | 1260-1400°C | No | No | Fine ware (kiln only) |
| Raku clay | 900-1100°C | Yes | Limited | Decorative, raku effects |
| Air-dry clay | None | No firing needed | No firing needed | Decorative, beginners |
If you want the full picture on standard cone-fired work, our guide to how kiln firing actually works covers the conventional path in detail. The rest of this article assumes you do not have access to a kiln.
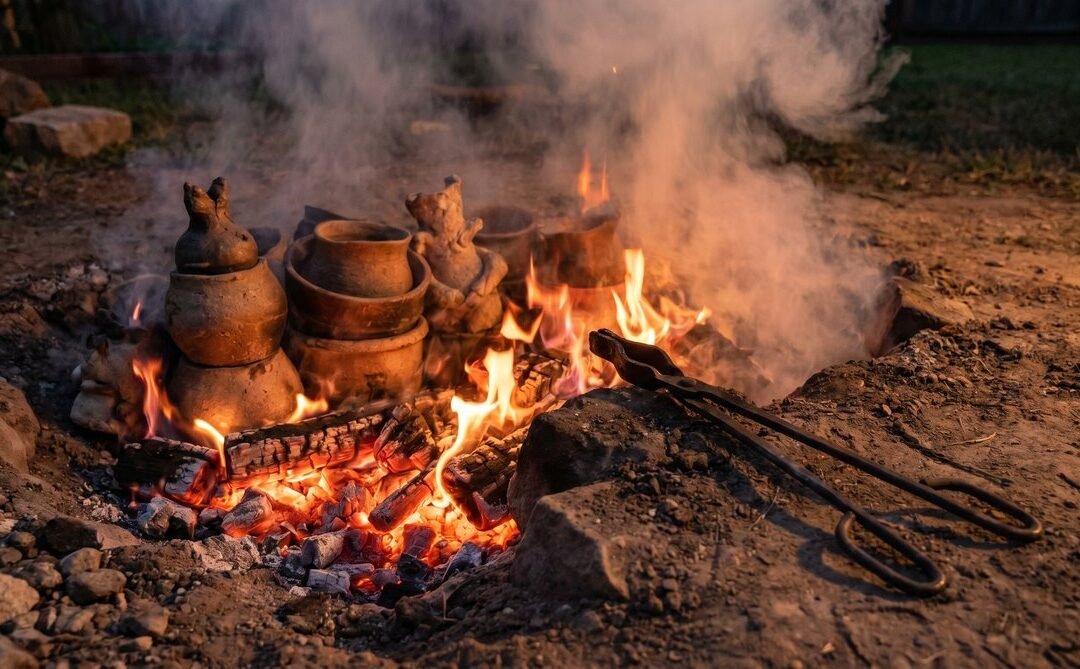
Method 1: Open fire or campfire firing (the original method)
Humans have been firing pots in open fires for roughly 20,000 years. The technique still works, and it produces results with a character no electric kiln can match.
How the technique works
Build a bed of hot coals using hardwood. Place your pottery on a layer of rocks above the coals so air can circulate underneath. Stack more fuel around and over the pieces, then fire for 15-45 minutes once the pots are glowing. Let everything cool slowly under the ash, ideally overnight.
Wood matters more than people realize
Use hardwood. Oak, juniper, ash, and mesquite all hold coals long enough to sustain temperature. Avoid pine and other softwoods: they burn fast, throw sparks, and leave sappy residue. The goal is sustained heat, not a flashy bonfire.
Pre-warming is non-negotiable
The most common failure mode for outdoor firing is cracked or exploded pots. The cause is almost always residual moisture. Even pieces that feel dry can hold mechanically bound water that will turn to steam when heated, and steam expanding inside a clay wall is what blows pots apart.
Pre-warm your pottery near (not in) the fire for at least 30 minutes before main firing. Rotate the pieces. Listen for any hissing. Our guide on whether pottery can be too dry to fire covers the moisture science in detail, and the short answer is: pieces should be bone-dry before they ever see flames.
Cover sherds
Traditional potters protect greenware with “cover sherds,” which are pieces of previously fired pottery (broken plates, old bricks, terracotta shards) placed over the pots. They prevent direct fuel contact, reduce fire clouds, and even out the heat. If you want a cleaner finish, use them. If you want dramatic carbon smudges, skip them.
What it produces
- Temperature: 700-1000°C depending on fuel and fire management
- Works for: natural and decorative earthenware, sculptural pieces, primitive-style work
- Does not work for: food-safe glazed pieces or modern stoneware clay bodies
For a deep historical look at how primitive potters built outdoor fires, the technique has barely changed in millennia, and the results are authentic earthenware in every sense.
One practical note: check your local fire regulations. Many urban and suburban areas prohibit open fires, and pit-firing on a code-violating bonfire is a bad way to spend a weekend.
Method 2: Pit firing (smoke firing)
Pit firing is open fire’s more controlled cousin. The pit concentrates heat and traps combustion products, so smoke and carbon directly affect the surface of the clay. The results are unpredictable in the best way: every piece comes out with unique surface patterns, dark flashes, and color variation that you cannot replicate with glaze.
The basic setup
Dig a pit roughly 60-90 cm deep and wide enough for your pieces with breathing room. Line the bottom with sawdust, dry leaves, and newspaper. Place your pottery in a nest of more sawdust, surrounded by combustible materials (banana peels, copper wire, salt, seaweed are all traditional “colorants”). Stack hardwood on top, light it, and let it burn down over several hours.
Temperatures and the smoke effect
Pit firing typically reaches 600-900°C, and well-built pits can push close to 1100°C. That is lower and more variable than a hot open fire, but the reduction atmosphere created by all that smoldering organic material is the whole point. Carbon penetrates the clay surface and creates the matte black and gray markings that give pit-fired pieces their distinctive look.
Honest pros and cons
- Pros: low cost, accessible to anyone with a yard, produces distinctive aesthetic results, deeply forgiving for beginners who do not care about consistency
- Cons: no temperature control, highly variable results, produces fragile low-fire pieces, no two firings are alike
We suggest treating each pit firing as an experiment, not a production run. Works for decorative pieces, sculptural work, and surface-effect studies. Does not work for functional or food-safe ware.
Method 3: Raku firing
Raku is a Japanese-derived technique that became popular in Western studio pottery in the 1960s. It produces some of the most dramatic visual effects in ceramics: crackled glazes, metallic lusters, deep carbon flashing.
How raku actually works
Pieces are first bisque-fired (a low temperature initial firing that drives off chemically bound water and hardens the clay). They are then glazed and loaded into a raku kiln, heated rapidly to 760-1000°C, and pulled out while glowing hot using long metal tongs. The hot pieces are immediately dropped into a metal bin filled with newspaper, sawdust, or leaves, which ignites instantly and creates a reduction chamber. This is where the carbon flashing and luster develop.
The catch nobody mentions
True raku requires at least a bisque fire, and a proper bisque fire requires a kiln. A traditional raku kiln is a separate piece of equipment, typically gas-fired, costing $200-$800 used.
If you want fully kiln-free raku, you are working with a compromised version of the technique. Some potters use a microwave kiln for the bisque stage and then take the bisqueware outdoors for the raku reduction. That hybrid approach works for small pieces.
For temperature details and a more technical breakdown, the team at Soul Ceramics published a good overview of raku and pit-firing requirements that includes specific cone numbers and equipment notes.
What raku is good for
- Decorative art pieces with dramatic surfaces
- Studio practice (with proper kiln access)
- Experimental surface effects, especially metallic and crackle glazes
The technique on glazes is also specialized, which we touch on in our primer on glaze chemistry for beginners.
Method 4: Microwave kiln
The most accessible modern option is a small ceramic fiber container that goes inside a standard household microwave. It is the only kiln-free method on this list that gives you any real control over temperature.
How it works
The microwave kiln is a hollow ceramic fiber shell, usually 12-15 cm wide, with a black silicon carbide coating on the inside. The coating absorbs microwave energy and converts it to heat, and the ceramic fiber traps that heat. Put a small piece inside (typically under 10 cm), set the microwave on full power for 10-15 minutes, and the interior can reach cone 06 – roughly 998°C.
What it is actually good for
- Small pieces: pendants, tiles, beads, pinch pots
- Glass fusing projects
- PMC (precious metal clay) jewelry
- Low-fire earthenware tests and small experimental pieces
The real limitations
Microwave kilns only fit very small items. Anything larger than a pinch pot will not fit or will fire unevenly. They cannot reach stoneware temperatures. We suggest using a dedicated secondhand microwave rather than your kitchen microwave for this purpose. Cost is modest: roughly $30-$70 for a basic kit.
The kiln-free option nobody talks about: air-dry clay
If you searched for “how to fire pottery without a kiln” and want to make decorative pieces (sculptures, ornaments, wall art, jewelry, kids’ projects), the honest answer is: you may not need to fire anything at all.
Air-dry clay hardens in ambient air over 24-72 hours. No fire, no kiln, no equipment. Common brands include Crayola Model Magic, Das Modelling Clay, and Amaco’s air-dry lines.
Honest limitations
- Not food-safe
- Not waterproof, though sealants help
- More fragile than fired pieces
- Cannot be glazed with standard ceramic glazes (use acrylic paint and a sealant instead)
For decorative work, air-dry clay is easier, cheaper, and far more consistent than any outdoor firing. If you are starting from zero, see our guide to picking the right clay as a beginner, which covers both air-dry and fired options.
Comparison table: 4 methods at a glance
| Method | Equipment | Max temp | Food-safe? | Clay types | Skill | Cost |
|---|---|---|---|---|---|---|
| Open fire | Hardwood, rocks, space | ~1000°C | No | Earthenware, raku clay | Intermediate | $0-$50 |
| Pit firing | Shovel, fuel, organics | ~900-1100°C | No | Earthenware, raku clay | Beginner-friendly | $20-$100 |
| Raku (basic) | Raku kiln or improvised chamber, tongs, reduction bin | ~1000°C | No | Raku clay (bisqued) | Advanced | $200-$800+ |
| Microwave kiln | Microwave kiln kit, microwave | ~998°C (cone 06) | No | Small earthenware, PMC, glass | Beginner | $30-$70 |
| Air-dry clay (no firing) | None | N/A | No | Air-dry only | Absolute beginner | $10-$30 |
What you actually need to get started with pit firing
If pit firing is the route you want, here is the realistic starter list. Pit firing is the most practical kiln-free method for most hobbyists.
Tools
- A shovel or a pre-dug pit (60-90 cm deep)
- Hardwood logs and/or hardwood charcoal
- Newspaper, dry leaves, sawdust (kindling and reduction material)
- A bucket of sand or water nearby (fire safety)
- Long heat-resistant gloves and metal tongs
- Optional colorants: copper wire, banana peels, seaweed, table salt
Clay choice matters more than fire technique
Use a natural earthenware or a grogged low-fire clay with enough temper to survive thermal shock. Commercial raku clay or handbuilding clay rated for low fire performs far better than throwing stoneware. Our overview of clay types for new potters walks through grog, temper, and which bodies forgive beginner mistakes.
Drying time
Pieces must be bone-dry before any firing. Plan on at least 48-72 hours for thin small pieces, longer for anything thick-walled. If you can feel any coolness against your cheek when you press the clay to your face, it still holds moisture and will likely explode in the fire.
Prep tips
- Score and slip when attaching coils or handles
- Keep walls as even as possible to reduce thermal stress points
- Avoid hollow enclosed forms unless you pierce them
- Start small: tiles and pinch pots before pitchers
FAQ
Can you fire pottery in a regular oven?
No, not in any real sense. Home ovens top out around 260°C (500°F), which is hundreds of degrees below the temperature needed to fuse clay particles. Our guide on whether pottery can be fired in a kitchen oven explains why this myth keeps coming back.
What is the cheapest way to fire pottery at home?
Pit firing in a backyard or open area, assuming you have access to free hardwood. Total cost can be near zero. The microwave kiln is the cheapest controlled option, at $30-$70. Air-dry clay sidesteps the firing question entirely for around $10-$20 per package.
Can pit-fired pottery hold water?
Not reliably. Pit-fired pottery is porous earthenware, and water will gradually seep through the walls. You can seal the inside with food-grade beeswax or commercial pottery sealants for short-term water use, but pit-fired pieces should not be used for drinking vessels or long-term water storage.
What kind of clay can you fire without a kiln?
Low-fire earthenware, raku clay, and natural dug clays. Avoid stoneware bodies (cone 6-10), since they require temperatures well beyond what a campfire or pit can produce. Look for clay labeled “earthenware,” “raku,” “handbuilding low-fire,” or “pit-fire suitable.”
How hot does a campfire get, and is it enough to fire pottery?
A well-managed campfire with hardwood coals reaches 700-1000°C (1290-1830°F). That is enough for low-fire earthenware, just barely. Active fire management (continuous fueling, good airflow, a tight stack of cover sherds) is the difference between a usable result and a pile of crumbly fragments.
Do you need to glaze pottery fired without a kiln?
No, and in most cases you should not try. Standard ceramic glazes are formulated to mature at specific cone temperatures and will not melt properly at pit-fire temperatures. The traditional approach is to leave pit-fired pieces unglazed and rely on smoke surface effects. For a satin sheen, terra sigillata (a fine clay slip burnished before firing) works beautifully without any glaze chemistry.