
Setting Up a Pottery Studio at Home: Space, Costs, and Everything You Need
Most home pottery studio guides hand-wave the two things that actually decide whether your setup works: real equipment footprints and silica dust control. They give you a $1,000 to $10,000 cost range, skip the ventilation specs, and never mention that a kiln needs a 50-amp circuit and 18 inches of clearance. This guide fixes that.
You will find specific tier-by-tier costs with current equipment prices, the minimum square footage your gear actually needs, and the CFM and electrical numbers required to fire safely at home. We have helped dozens of students set up their first studios, and the same questions come up every time, so we have written the answers down here.
A home pottery studio needs three things: a forming setup (a pottery wheel or hand-building table with around 30 square feet of clear workspace), a firing solution (an electric kiln on a dedicated 240V circuit, or paid access to a community kiln), and silica dust control (a downdraft kiln vent, a true HEPA air filter rated at least 200 CFM, and a wet-mop-only cleaning rule). Budget setups start near $500; a full home studio runs $6,000 to $15,000.
How Much Space Does a Home Pottery Studio Need?

Equipment footprints, not vague suggestions, decide your minimum space. A pottery wheel is typically 18 to 24 inches wide, but you need a 3-foot working radius around it so you can move your arms, set down tools, and keep a water bucket in reach. A wedging table runs around 24 by 36 inches. An electric kiln needs 18 inches of clearance on every side from any combustible surface, per Skutt’s published clearance guidance.
Apartment pottery corner (80 to 120 sq ft minimum)
An apartment setup works for forming, not firing. You need roughly a 10 by 10 foot area: enough for a tabletop or compact floor wheel, a small wedging surface, two stackable shelves for greenware, and a 5-gallon water bucket. Plan on a vinyl drop cloth under everything because clay slip will track into carpet on day one.
Firing in an apartment is usually a non-starter. Most leases prohibit kilns, and even small ones draw 23 to 30 amps on a 240V circuit your unit probably does not have. The realistic plan is a wheel at home plus paid firing at a nearby community studio.
Garage or basement studio (ideal for most setups)
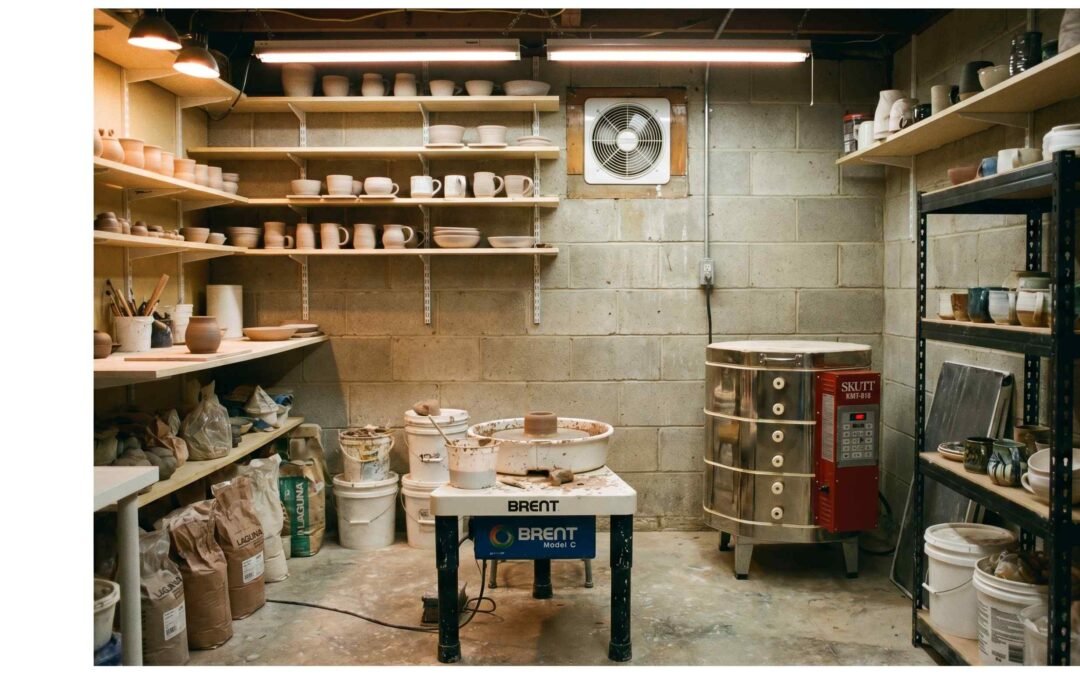
A 150 to 250 square foot garage corner is the sweet spot for a home pottery studio. You get a concrete floor (which Skutt actually requires for kiln placement), a wall to run the exterior vent through, and usually space to add a 240V circuit without crossing finished living space. A typical layout puts the wheel near a window for daylight, the wedging table along one wall, ware shelves between them, and the kiln in its own 6 by 6 foot zone with clearance on all four sides.
Basements work too, but they raise the bar for ventilation. Dust settles and stays, humidity slows greenware drying, and you have to duct kiln fumes up and out, which means a longer run with elbows. Skutt rates a 4-inch duct for up to 50 feet with three bends; anything beyond that needs a larger diameter.
Dedicated room studio (full setup with kiln)
If you have a 200+ square foot dedicated room, you can run a complete studio: floor-model wheel, full wedging station, slab roller, glaze table, drying rack, ware shelves, and a kiln. Add a utility sink and you have the layout we suggest for anyone planning to sell work. Avoid carpet, drywall directly behind the kiln, and any shared HVAC return that could pull silica dust into the rest of the house.
Home Pottery Studio Cost Breakdown
The honest answer to “how much does a home pottery studio cost” depends on whether you need to fire your own work. Forming gear is cheap. Firing gear, properly vented, is where the bill jumps.
Budget tier: $500 to $1,500 (hand-building or shared kiln access)
This tier skips the kiln. You buy clay, hand-building tools, a basic wheel or work table, simple drying shelves, and pay $5 to $15 per piece to fire at a community studio. It is the right starting point for almost every beginner because it lets you build skills before committing to a five-figure setup. Our breakdown of whether pottery can be done at home covers the no-kiln workflow in more detail.
Mid-range tier: $2,000 to $5,000 (entry wheel + small electric kiln)
The mid-range tier adds a personal kiln. You are looking at a tabletop or compact 0.7 to 1.6 cubic foot electric kiln, a half-horsepower wheel, the downdraft vent system, and the electrical work to install a 30-amp 240V circuit. This is enough capacity for a serious hobbyist firing one or two times a week.
Full studio: $6,000 to $15,000+ (professional-grade equipment)
A full home studio means a 7 cubic foot or larger production kiln on a 50-amp circuit, a one-horsepower professional wheel, a slab roller, a pugmill or clay mixer, ample ware shelving, and a proper ventilation system. At this tier you are ready to teach private students or sell at fairs. Our explainer on why pottery wheels are so expensive covers what you actually get for the price jump on the wheel side.
| Equipment | Budget ($500 to $1,500) | Mid-Range ($2,000 to $5,000) | Full Studio ($6,000 to $15,000+) |
|---|---|---|---|
| Pottery wheel | $0 (hand-build) to $400 (tabletop) | $700 to $1,400 (0.5 HP floor model) | $1,400 to $2,500 (1 HP professional) |
| Kiln (plus downdraft vent) | $0 (use community kiln) | $1,100 to $2,200 (0.7 to 1.6 cu ft) + $400 vent | $2,800 to $6,500 (5 to 10 cu ft) + $450 vent |
| Wedging table and shelving | $50 to $150 (DIY plywood and canvas) | $200 to $400 (sturdy bench plus 2 ware racks) | $500 to $1,200 (commercial wedging table, 4+ racks) |
| Hand tools and ribs | $30 to $80 (10-piece starter kit) | $100 to $200 (expanded kit, sponges, calipers) | $250 to $500 (full kit plus specialty trimming tools) |
| Clay (per 50 lb) | $25 to $40 (one box stoneware) | $75 to $140 (two to four boxes, varied bodies) | $250 to $500 (eight+ boxes, porcelain and specialty) |
| Glazes and oxides | $60 to $150 (4 to 6 pre-mixed pints) | $200 to $500 (10+ pints plus underglazes) | $400 to $1,000 (dry materials, mixing setup, oxides) |
| Ventilation and safety | $80 to $150 (HEPA filter, N95 respirator, mop) | $250 to $500 (true HEPA air purifier 200+ CFM, respirator) | $600 to $1,200 (large HEPA unit, kiln vent, eye wash) |
| Electrical (240V circuit install) | $0 | $400 to $900 (30A dedicated circuit) | $900 to $1,800 (50A circuit, sub-panel if needed) |
| Total range | $500 to $1,500 | $2,000 to $5,000 | $6,000 to $15,000+ |
Essential Equipment for a Home Pottery Studio
Choosing a pottery wheel for home use
Motor size is the first decision. A quarter-horsepower motor will throw 10 to 15 pounds of clay, which is plenty for mugs, bowls, and small vases. A half-horsepower wheel handles 25 to 50 pounds and runs quieter under load, which matters in a small home space. A full horsepower wheel is overkill for most home potters unless you plan to center 20+ pound forms regularly.
Noise is the other home-studio factor. Belt-drive wheels typically run at 50 to 60 dB at the throwing position, similar to a dishwasher. Direct-drive wheels are quieter but cost more. Tabletop wheels save floor space but limit you to smaller pieces, while floor models give you a built-in splash pan and footswitch room. Our guide to choosing a pottery wheel walks through specific models at each price point.
Home kilns: electric vs. gas, and why apartments are complicated
Electric kilns are the only realistic option for a home studio. Gas kilns require natural gas or propane plumbing, more clearance, and outdoor or open-shed installation. A small electric kiln plugs into a 240V circuit (technically 208 or 240 in the U.S., not the “220” most appliance labels suggest, as Skutt’s installation notes point out) and lives in your garage or dedicated studio room.
Three electrical numbers matter. First, voltage: confirm with an electrician whether your house has 208V or 240V power. Second, amperage: a 0.7 cubic foot tabletop kiln pulls about 20 amps, a 1.6 cubic foot kiln pulls 30, and a 7 cubic foot production kiln can draw 48 amps. Third, the circuit must be dedicated, fused correctly, and run on the right gauge wire by a licensed electrician.
The downdraft vent is not optional. Skutt’s EnviroVent 2 is a 140 CFM downdraft system designed to pull kiln fumes (carbon monoxide, sulfur dioxide, formaldehyde) out through a 4-inch exterior duct. Building codes in most jurisdictions require active venting on indoor electric kilns. For broader background, our piece on how to fire pottery covers the actual firing schedules and cone temperatures.
Wedging table and clay storage
A wedging table needs three properties: solid, level, and absorbent. Most home potters build a 24 by 36 inch surface from 3/4-inch plywood, top it with stretched canvas, and bolt it to a sturdy base at hip height (around 36 to 38 inches for most adults). Plaster slabs work too but crack if you drop them.
Clay storage matters more than beginners think. Clay that dries out becomes nearly unusable without re-wedging. Keep working clay in heavy-mil plastic bags inside a 5-gallon bucket with a tight lid, or in a Rubbermaid tote with a damp sponge to maintain humidity. Bagged clay in its original box lasts months if you keep it sealed.
Essential tools and glazes to start
You need fewer tools than starter kits suggest. The non-negotiables: a wire clay cutter, a wooden rib, a metal rib, a needle tool, a sponge, a fettling knife, a few wooden modeling tools, and trimming loop tools in two or three sizes. Most beginners over-buy ribs and under-buy sponges; you can never have too many natural sponges.
For glazes, start with three or four pre-mixed pints in colors you actually want. Pre-mixed glazes cost more per ounce than dry mixing but skip the dry materials handling, which is the highest-silica-exposure activity in pottery. Our overview of what glazing is in pottery explains how application thickness affects results.
Ventilation and Silica Dust Safety (Do Not Skip This)
This is where most home studio guides fail you. Silica dust is the single biggest health risk in pottery, and it does not announce itself: respirable crystalline silica particles are 100 times smaller than ordinary sand, you cannot see them, and they do permanent damage to your lungs over years of low-dose exposure.
Here is the central rule: wet clay is safe; dry clay materials are not. When clay is wet, silica particles stay bound in the matrix. When clay dries, gets sanded, or sweeps up as dust, those particles go airborne and stay there for hours.
What activities are highest risk
The dust-generating activities, ranked by risk: mixing dry glaze materials, sanding bisqueware, trimming bone-dry greenware, sweeping dry clay scraps, and emptying vacuum cleaners that lack HEPA filtration. The last item is why home potters who shop-vac their studios end up exposed; a regular vacuum redistributes silica into the air.
OSHA exposure limits
The OSHA permissible exposure limit for respirable crystalline silica in general industry is 50 micrograms per cubic meter of air, averaged over an 8-hour day, with an action level of 25 micrograms. Pottery and ceramics manufacturing is explicitly covered by this standard. Workplace exposure can cause silicosis, lung cancer, COPD, and kidney disease, and silicosis typically appears 15 to 20 years after the start of exposure, which is why home potters underestimate the long-term risk.
Practical ventilation specs
For a home studio under 250 square feet, we suggest the following minimum stack:
- A true HEPA air purifier rated at 200+ CFM clean air delivery. “True HEPA” filters 99.97% of particles 0.3 microns and larger. HEPA-type or HEPA-style filters are not the same and will not catch respirable silica.
- A downdraft kiln vent rated at the manufacturer’s spec for your kiln size. The Skutt EnviroVent 2 at 140 CFM handles up to two 12 cubic foot kilns through a 4-inch exterior duct. Run the duct up to 50 feet with no more than three 90-degree bends.
- An N95 or P100 respirator worn anytime you mix dry materials, sand bisqueware, or clean up dry clay dust. Cloth masks and surgical masks do nothing for silica.
Wet mopping protocol
Never dry sweep a pottery studio. Sweeping aerosolizes settled silica dust that takes hours to fall back out of the air. The standard protocol: wipe surfaces with a damp sponge, then mop the floor with plain water (no detergent needed) at the end of every session. Empty mop water down the utility sink with a clay trap installed; never down a regular sink, because clay particles will eventually clog the drain.
Setting Up Your Home Pottery Space
Flooring (concrete is best; sealed concrete or vinyl if renting)
Bare concrete is the gold standard. It does not absorb spills, it tolerates mop water, and it provides the non-combustible base Skutt requires for kiln placement. If you rent or have a basement with a poured slab, you are ready as-is.
If you have wood subfloor, lay down sheet vinyl or commercial-grade marine vinyl that you can wet-mop. Never put a studio over carpet; it traps clay dust and you cannot clean it. For kiln placement on non-concrete surfaces, Skutt’s spec calls for a non-combustible substrate and 2 inches of masonry extending 12 inches beyond the kiln on all sides.
Water access and drainage (a utility sink is worth the investment)
Plumbing a utility sink into your studio pays for itself fast. You will wash hands, rinse buckets, clean tools, and dump mop water dozens of times per session, and the alternative (carrying water in and out) gets old fast.
Install a clay trap, sometimes called a Gleco trap, between your sink and the drain. Clay particles settle in the trap instead of building up in your pipes. Empty the trap every few weeks into the trash, never down the drain. A basic Gleco trap costs $60 to $100; replacing clogged plumbing costs hundreds.
Lighting and electrical
Light your wheel from two directions if possible. A single overhead source casts shadows inside the form just where you need to see wall thickness. We suggest one bright overhead LED at around 4000K plus an adjustable task lamp on a swing arm.
Electrical needs grow fast. At minimum: a dedicated 240V/30A circuit for the kiln, a 120V outlet within 8 feet of the kiln for the downdraft vent motor, a separate 120V circuit for the wheel and any fans, and GFCI protection anywhere near water. Have an electrician do the work; insurance will not cover a fire from a hobbyist-wired kiln circuit.
Frequently Asked Questions
Can I set up a pottery studio in an apartment?
Yes, for hand-building and wheel work, but firing is the obstacle. Most apartments lack the 240V circuit and exterior-vented downdraft system a kiln requires, and many leases prohibit them outright. A practical apartment setup uses a tabletop wheel, sealed clay storage, a damp-only cleaning routine, and a paid kiln-share service nearby.
Do I need a kiln to do pottery at home?
No. Many home potters work with clay, then pay a community studio or pottery store to bisque and glaze fire their pieces. Typical kiln rental costs $5 to $15 per piece or $40 to $80 per shelf. Air-dry clay is another option for decorative work, though it is not food safe or watertight.
How much electricity does a home pottery kiln use?
A small home kiln draws 23 to 30 amps at 240V and uses roughly 25 to 50 kWh per firing depending on size and cone. At an average U.S. electricity rate of about $0.16 per kWh, a typical bisque or glaze firing costs $4 to $8. Most home kilns run on a dedicated 30A or 50A circuit installed by an electrician.
Is home pottery safe without ventilation?
Wheel throwing with wet clay is low risk, but firing without ventilation is not safe. Electric kilns release carbon monoxide, sulfur dioxide, and formaldehyde during bisque firings. Sweeping dry clay or sanding bisqueware also releases respirable silica. A downdraft kiln vent and a true HEPA air filter are the minimum for safe home firing.
What is the cheapest way to start pottery at home?
Skip the wheel and kiln. Start with $150 to $300: 25 lb of stoneware clay, a basic hand-building tool kit, a wire cutter, a rolling pin, plastic for slow drying, and a paid firing service at a local studio. This lets you learn pinch pots, coiling, and slab building before committing to bigger equipment.
The Bottom Line
A home pottery studio is one of the most rewarding setups a hobbyist can build, but the decisions that actually matter are the ones beginner guides skip. Plan around the real equipment footprints, the 240V circuit, and the downdraft vent before you fall in love with a wheel. Get the ventilation right on day one, because silica dust does its damage slowly and you will not notice the exposure until decades later.
Start in the budget tier if you are new. Use a community kiln for your first 12 months, learn what kind of work you want to make, and then scale up to a mid-range or full studio once you know whether you need 1 cubic foot of kiln space or 7. The studio you build the second time will be the right one.