
Pottery Tools for Beginners: What You Actually Need to Start
Most beginner pottery guides list 20 or 30 tools, and most of those tools sit in a drawer for the first six months. The truth is leaner: a single $15 kit will carry you through your first dozens of pots on the wheel or the bench. The smart move is starting small, finding your specific frustrations, and then buying solutions for those.
This guide ranks the tools that matter, the ones that can wait, and the ones you will probably never need. It also gives you a clear three-tier budget so you know what to spend and when. If you are also still shopping for the equipment itself, our roundup of the best beginner pottery wheels pairs naturally with the tool list below.
The 6 Tools Every Beginner Needs (and What Each One Does)
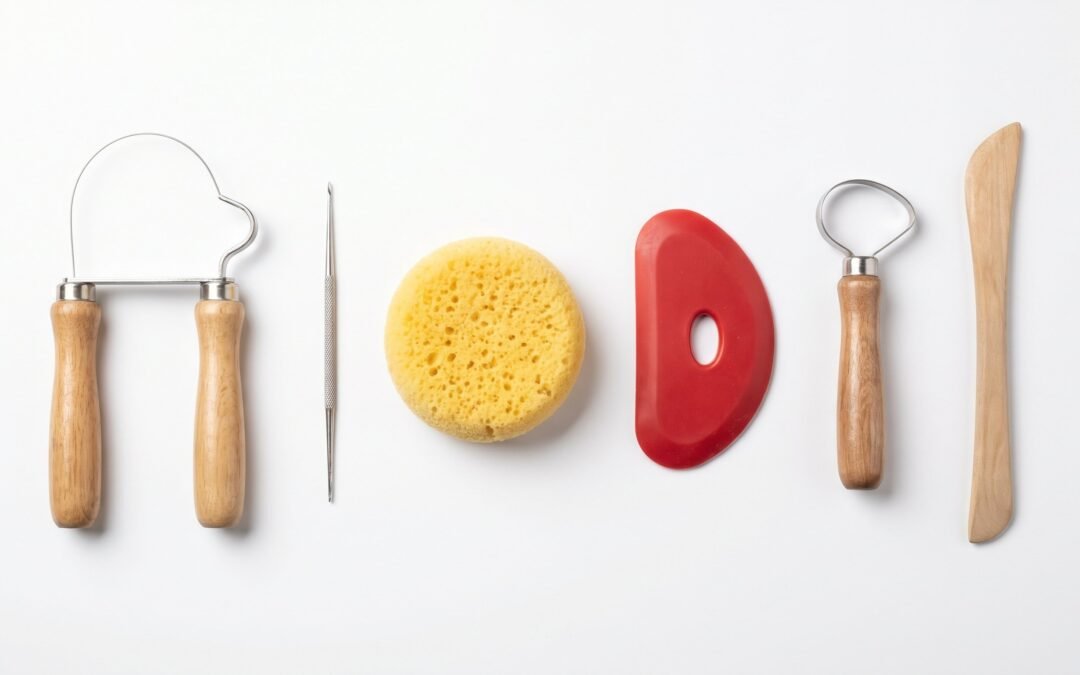
These six tools appear in every beginner kit and cover both wheel throwing and handbuilding. Buy them as a set, not individually.
| Tool | Primary Use | Wheel Throwing | Handbuilding | Solo Cost |
|---|---|---|---|---|
| Wire cutter | Cut clay off wheel, slice blocks | Essential | Useful | $3-$5 |
| Needle tool | Check wall thickness, trim rim, score for joins | Essential | Essential | $3-$5 |
| Sponge (keep 2) | Moisture control, rim smoothing | Essential | Useful | $2-$4 each |
| Wooden rib | Shape curves, compress walls, remove throwing rings | Useful | Useful | $4-$7 |
| Loop trimming tool | Remove clay from foot ring during trimming | Essential | Less needed | $4-$8 |
| Wooden modeling tool | Blend seams, smooth joins, add detail | Less needed | Essential | $3-$5 |
Buying separately costs $19 to $34. The better move for most beginners is a starter kit. The classic 8-piece pottery tool kit from The Ceramic Shop includes all six tools plus a metal rib and a second trimming tool. At $8.96 (list $11.95), it is hard to beat.
Wire cutter
A simple wire strung between two handles. You slide it under your finished piece to cut it free from the wheel head or bat. You also use a heavier wire cutter to slice blocks of clay for wedging. The Ceramic School notes that the MudTools clay cutting wire, with a 15-inch stainless cable, cuts cleanly even through heavily grogged clay.
Needle tool (pin tool)
A sharp metal needle mounted in a handle. Use it to level an uneven rim while the wheel spins by holding the needle against the rim at a slight angle so it cuts a clean horizontal line. Use it to check wall thickness by pushing it gently down through the clay until it hits your fingertip inside. And use it to score surfaces before joining two pieces of clay with slip.
Sponge
Keep two. One stays dry-ish and is used during throwing, squeezing water into the clay as you center and pull. The other is for glazing and cleanup. Studio potter Susan O’Hanlon’s beginning wheel thrower’s toolbox echoes this point: keeping a separate sponge for cleanup prevents slip and glaze residue from getting back into your clay.
Wooden rib
A flat or slightly curved piece of hardwood that you hold against the spinning clay. It compresses the surface, removes throwing rings, and helps you create consistent curves. A triangular hardwood rib gives you three working edges (short straight, long straight, and curved), which is why it is usually the type in starter kits.
Loop trimming tool
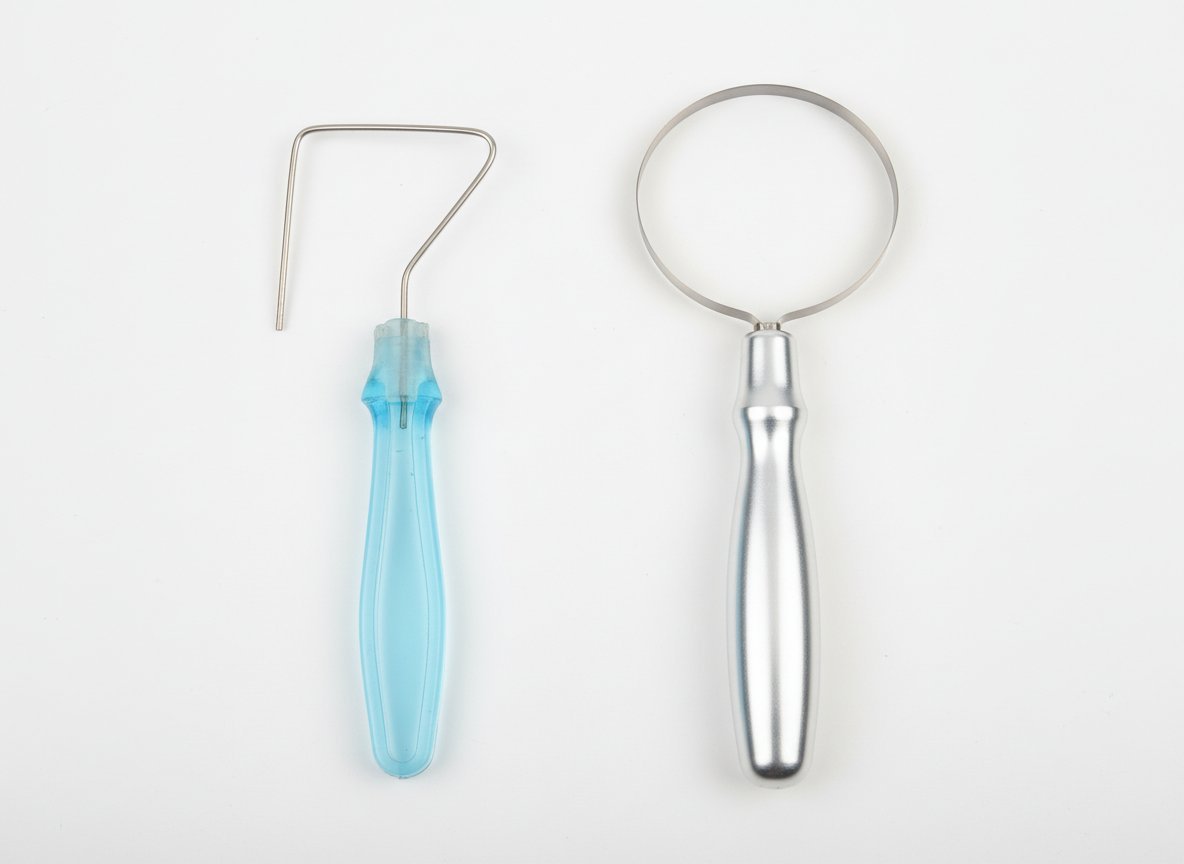
A small metal loop on a handle, used when the clay is leather-hard to remove excess clay from the base and create a clean foot ring. This is the “second session” tool: you throw today, trim tomorrow. Look for one with a sturdy loop, because cheap thin-wire loops bend under pressure.
Wooden modeling tool
A double-ended tool used mostly in handbuilding. One end is typically pointed for detail work; the other is flat or paddle-shaped for blending coil joins. Wheel throwers use it less often, but it is worth having in the kit.
When to Upgrade (10+ Hours on the Wheel)
Once you have at least 10 hours of throwing practice, these tools earn their place.
Metal rib (flexible)
Creates sharper angles and smoother compressed surfaces than a wooden rib. The flexible version bends to conform to curves. Studio potter Susan O’Hanlon offers a studio potter’s recommended beginner tool list that warns against cheap metal ribs with overly sharp edges; they will give you a vicious paper-cut-style nick. Spend a little more for a rib with a smooth, slightly rolled edge.
Rubber or silicone rib
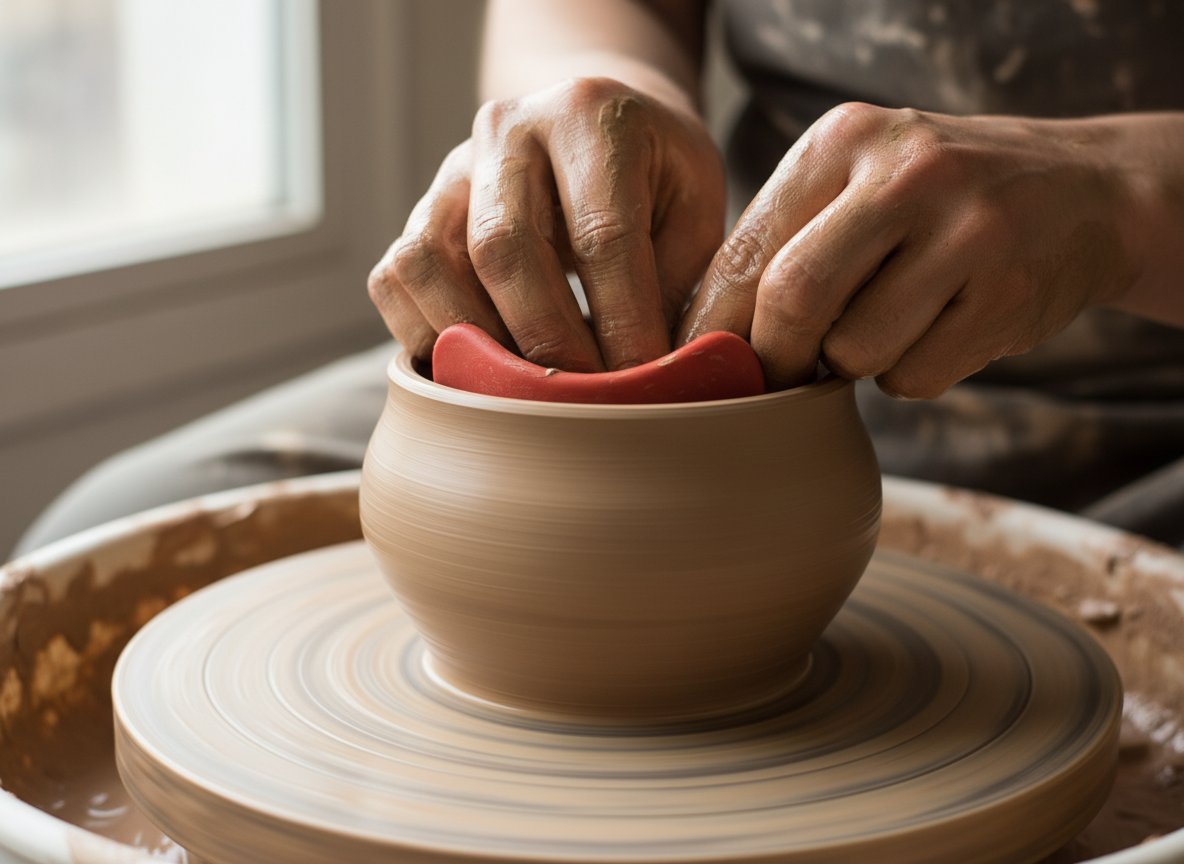
The MudTools R1 Red Rib is the upgrade most potters mention first. Designed by potter Michael Sherrill, the kidney-shaped red rib (the most flexible in the MudTools line) shapes curved walls without effort and is durable enough to last years. Price: around $8 to $10.
Throwing stick / sponge on a stick
Essential once you start making taller pieces with narrow openings. Your hand physically cannot reach the inside of a 12-inch vase, but a sponge on a stick can. You can make one from a wooden dowel and a small piece of sponge in five minutes.
Better trimming tools
The Dirty Girls Trim Tools have become a favorite in the ceramics community for their ergonomic handles and clean cutting edges, particularly for foot ring trimming. Dolan and Kemper make reliable budget alternatives.
Tools for Wheel Throwers vs Handbuilders
This section covers tools that only matter once you specialize.
Wheel throwing
- Bats: Flat discs (plastic, plaster, or Masonite) that attach to the wheel head. You throw on the bat, then lift the whole bat off, with no warping from handling wet clay. Plastic bats in the 10 to 12 inch size are the most versatile starting point. If you throw wide, flat bowls or plates, bats move from optional to essential fairly quickly.
- Calipers: Used when you make lids. You measure the jar opening with one end of the calipers and the lid with the other to ensure a fitted match. Not needed until you start making lidded jars.
- Giffin Grip: A plastic centering jig that holds your leather-hard piece centered on the wheel for trimming. Eliminates the most tedious part of trimming. Price: $65 to $75. An intermediate-level purchase, not a beginner one.
Handbuilding
- Rolling guides or wooden slats: Two identical-thickness wooden strips. Place clay between them when rolling slabs to get consistent thickness. A cheap but critical handbuilding tool.
- Texture tools: Anything with a texture (stamps, rollers, burlap, leaves) can be pressed into a slab for surface decoration. Most potters accumulate these organically.
- Harp wire / slab cutter: For slicing consistent slabs from a block of clay. A wire strung through an adjustable frame.
Budget Breakdown (What to Spend and When)
Three tiers, presented as a clear guide. If you want to zoom out even further on equipment costs, our breakdown of how much a pottery wheel costs puts these tool prices in context next to the bigger purchase.
Tier 1: First session ($10-$20)
The 8-piece starter kit. Covers everything you need for your first 20 to 30 pots. Do not buy anything else yet.
Tier 2: After 10 hours ($50-$75 total additional)
- MudTools R1 Red Rib: $8 to $10
- Dirty Girls Trim Tool or Dolan trimming tool: $10 to $15
- 2 plastic bats (10″): $15 to $20
- Sponge on a stick (DIY or commercial): $0 to $8
- Better needle tool (MudTools Mud Shark: foldable, multi-function): $12 to $15
Total Tier 2 additions: roughly $45 to $68.
Tier 3: Intermediate ($75-$100 more)
- Giffin Grip: $65 to $75
- Calipers: $10 to $15
- MudTools clay cutting wire: $15 to $18
A quick note: you do not need to buy at all tiers before you start throwing. Start with the $10 to $15 kit, make mistakes, find your frustrations, and then buy solutions to those specific frustrations. Over-equipping at the start is a common pattern and an expensive one. If you would rather assemble a complete pottery starter kit with wheel and tools bundled together, that can also bring the per-item cost down.
Tools You Do Not Need (Common Over-Buys)
- Extruder: Great for making coils and decorative trim, but wait 6 months. Almost every community studio has one you can use first to decide if you need your own.
- Slab roller ($150-$500+): Same logic. Use the studio’s.
- Full apron: A dedicated pottery apron is nice, but any old T-shirt or shop apron works while you are figuring out whether you love throwing.
- Multiple ribs before you have thrown 10 pots: You do not know your preferences yet. One wooden rib from the starter kit is enough.
- Fancy imported wooden tools: They are beautiful. They are not more functional for a beginner than what comes in a $10 kit.
A note on buying secondhand: unlike pottery wheels, where motor condition matters, hand tools are almost always safe to buy used. A used trimming tool or rib in good shape is the same as a new one. The bigger purchases, like a wheel, are where you want to think harder about pottery wheel brands and their reputations.
Where to Buy Pottery Tools
Bailey Pottery, The Ceramic Shop, and Axner are the major US ceramics suppliers. Bailey Pottery’s beginner supplies guide is a thorough resource if you want to go deeper on clay and workspace setup beyond just tools.
Amazon works for starter kits, but search specifically for “pottery tool kit” and check the review details. Many kits include tools that look the part but are made of thin metal that bends. Bailey Pottery’s beginner supplies guide includes specific brand notes that help sort quality from filler.
Local ceramics shops, if you have one, often let you handle tools before buying. It is worth doing for trimming tools and ribs, where the feel in your hand matters more than the spec sheet.
FAQ
What tools do you need to start pottery?
The 6 essentials: wire cutter, needle tool, sponge, wooden or rubber rib, loop trimming tool, and wooden modeling tool. Any beginner kit that costs $10 to $20 covers all six. That is genuinely all you need to start.
Can you use a beginner tool kit for both wheel throwing and handbuilding?
Yes. The 6 core tools in any beginner kit work for both. Wheel throwing puts more emphasis on wire cutters, ribs, and trimming tools. Handbuilding leans harder on modeling tools and loop tools. The difference matters more once you have done 20 or more hours and want tools specialized for one method.
What is a rib in pottery?
A rib is a flat or curved tool, in wood, metal, rubber, or silicone, that you hold against the clay while it spins on the wheel. It compresses the clay, smooths out throwing rings, and helps create consistent curves. Beginners usually start with a simple wooden rib before upgrading to rubber or silicone.
What pottery tools should I buy first?
Start with a basic 8-piece kit ($10 to $15) rather than buying individual tools. Once you have 10 or more hours on the wheel, the most useful single-tool upgrade is a rubber or silicone rib. The MudTools R1 Red Rib is a widely cited first upgrade among beginners and working potters alike.
Do I need bats for wheel throwing?
Not to start, but they become valuable quickly. Without bats, you wire your work off the wheel and carry it by hand, which is risky on wet clay because even a small squeeze distorts the form. With bats, you lift the whole bat off and let your work dry undisturbed. For wide flat pieces like bowls or plates, bats shift from optional to nearly essential once you are throwing with any consistency.
How much does a pottery tool kit cost?
A basic beginner kit runs $10 to $20 and covers everything you need to start. A mid-range set with upgraded ribs, better trimming tools, and a couple of bats costs around $50 to $75. Specialty tools like a Giffin Grip or calipers add another $75 to $100 once you reach an intermediate level.